With gas prices seeming to rise continually, the thought that we would be paying over £2,000 per year just for gas for our 1930’s four bedroom house finally prompted us to look at what we could do to bring our bills down. A year later, after taking action, our gas bill has dropped to under £1,000 and the house is warmer -a pleasant surprise for us. So what did we do to achieve this? Our actions can be broken into 10 steps.
1. Buy cheaper gas
Maybe not the most stunning insight but as you will see it is the follow through on things that matter – not just talking about them.
Like many people we were on probably the most expensive gas supply known to man (or woman), the British Gas Standard tariff. We decided to switch to an npower fixed rate tariff (we had our electricity with them) with the rate fixed until June 2015. There is no tie in so we can switch to another supplier at any time. We did go through some pain with npower, who just couldn’t cope with the influx of new customers they got when prices rose in October 2013 but thankfully that was sorted. The pain consisted of npower continually getting things wrong on the bill and not being able to fix them but we have not lost out financially – we did waste a few hours on the phone with them before it got resolved.
There are plenty of comparison sites around who can point you in the direction of other gas suppliers so do take advantage of these. If you have never switched supplier before then you are likely to get the greatest savings the first time you switch, as gas suppliers are notorious for finding ways to migrate their customers to their highest price gas. The industry regulator, Ofgem, have been quite active in the last 12 month and whilst you may not have noticed Ofgem have forced energy suppliers to make things simpler. Energy suppliers are now only allowed four different tariffs each rather than the hundreds they had before. So it is less easy for them to use smoke and mirrors to confuse you. In the very near future energy suppliers will also have to start putting you on the tariff that is cheapest for you.
I would not push anyone to switch to the absolute cheapest supplier if they are concerned about the financial standing of a business they have never hear of – just picking the lowest price from one of the big six will save you something. The important thing is to take some action and switch to a lower price today and keep your eyes open for any developments on price.
See compare gas prices to find out more about switching tariff.
2. Pay by direct debit not on receipt of bill
Most gas suppliers charge a premium if you don’t pay by direct debit, to reflect the extra costs of managing manual payments. These charges can add up to £80 or more a year so even if you are not a fan of direct debit it will benefit you to switch to this form of payment. It doesn’t usually matter whether you pay by monthly direct debit or quarterly – the monthly option allows you to pay a regular amount every month to smooth payments whereas the quarterly payment charges you your usage for the specific quarter. Just avoid the expensive “Receipt Of Bill” payment option.
Getting a better deal on gas can save you some cash but in the long term the greater savings will come from reducing the amount of gas you use. The trick is to ensure this is achieved whilst improving rather than reducing comfort in the home.
3. Adjust timing on water heating
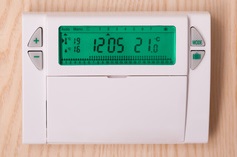
We already had a condensing gas boiler for central heating and water heating, TRV’s (Thermostatic Radiator Valves) on all the radiators bar one. We also had a reasonably modern digital controller controlled by a thermostat in the hall which allows us to choose weekend/weekday settings for water and central heating to come on separately twice per day. If you have not got these features on your gas central heating then its certainly worth investing in all of them.
There are sometimes grants for replacing an older style boiler with a newer and more efficient condensing boiler so this may not cost as much as you think. TRV’s cost around £10 each plus fitting but can help make rooms get to the right temperature faster and using less energy. With modern wireless technology, installing a wireless thermostat is much easier and cheaper than the older style mains controlled ones.
Having these things and also liking our comfort we didn’t want to adjust the central heating thermostat temperature down. Yes it can save money but it can reduce comfort and we prefer to do things that don’t require any compromise. However it is always worth looking at the timer settings on the controller and we decided that there was no need to heat the hot water for such a long time – we have a big hot water tank and with only two of us in the house never run out of hot water. So we reduced the hot water heating to 30 minutes twice per day, once in the early morning and once in the early evening. Our hot water tank can easily be heated in this time. I am not sure what it has saved us, if anything, but it certainly won’t have cost us anything.
So far we have described things that can be done with zero cost but now we will look at a few things that can cost a few quid.
4. Insulate the roof space
Warm air rises so a good place to start saving energy is the top of your home in the loft. Putting a depth of 270mm of insulation on the floor of the loft is now advised for mineral wool quilt insulation and very often grants are available to have this done, even if you have some insulation there already.
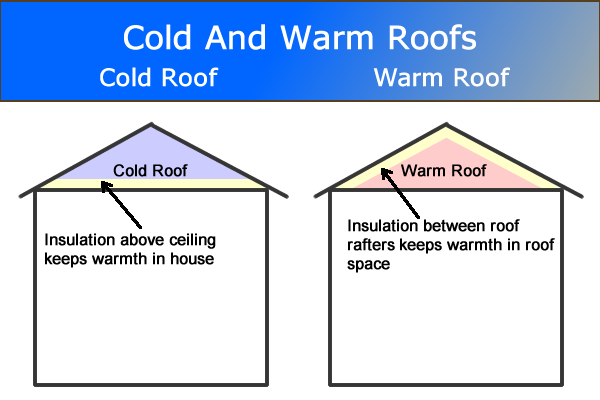
This assumes you have a cold roof (the space under the roof is uninsulated so the loft is cold) rather than a warm roof (the roof is insulated between the roof rafters and so the loft retains heat).
See A Guide To Roof Construction for a more detailed explanation of the difference between a warm and a cold roof.
We already had 100mm of insulation but managed to get it topped up to the right level for £80 – it would have been more without a government subsidy.
5. Insulate the loft hatch to prevent draughts
Draughts are, in our view, the biggest enemy of keeping warm. The loft hatch is very often just a piece of badly fitted thin plywood so there is scope for improvement here. Any gaps in the loft hatch will allow your expensively heated warm air to rise into the roof space and be lost. This can be corrected by using some form of weather stripping on the hatch itself. Weatherstripping is just a self-adhesive foam strip that can be used to seal any gaps between the hatch and the wood surround that supports it. You will know whether you need to weatherstrip by feeling round the hatch for any draughts. Even a small draught will be costing you money.
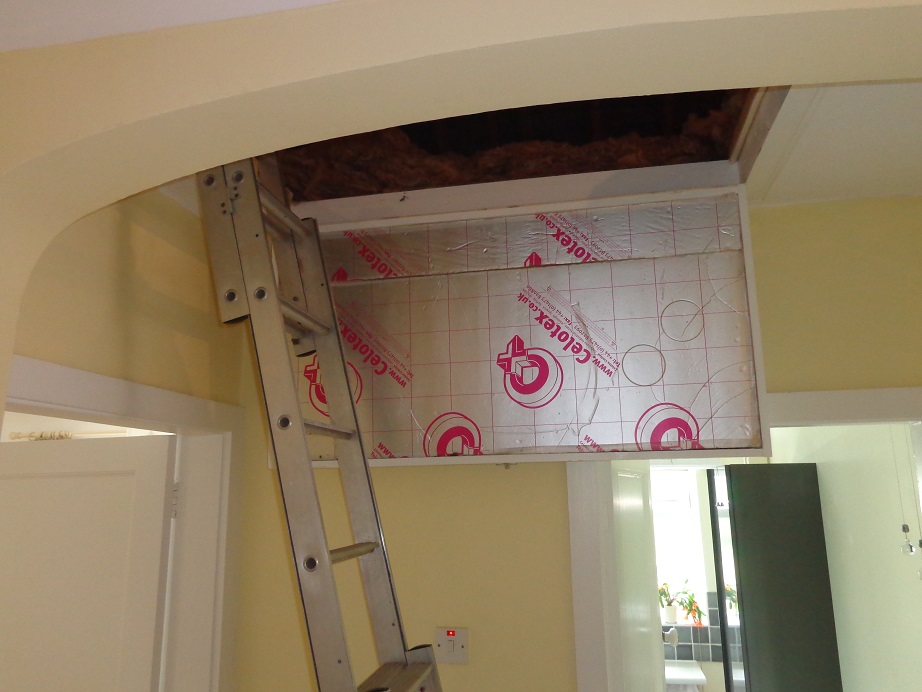
As well as cutting out the draught it is also worth insulating the hatch. We used 50mm thick Celotex which is PIR thermal insulation board. PIR stands for Polyisocyanurate Insulation Board if you really want to know. There are various other brands including Kingspan boards. These boards will cut out thermal loss through the plywood hatch. We have a hinged loft hatch which comes down so put the insulation in the cavity (see photo) but you could just as easily stick the board to the top of the loft hatch unless you use the loft very frequently.
Insulating the loft hatch cost about £11 – £6 for a 50mm thick piece of celotex 1200 x 450mm and £5 for some extra thick white weatherstip.
6. Block up some of the room ventilation
A couple of our rooms had air bricks which went directly to the outside and made the rooms very cold. One was a former bathroom which is now a bedroom so the ventilation was not really needed. We used closable louvred vents to cover these bricks. The one in the bedroom is closed all the time. The one in the small downstairs toilet is half open to allow some fresh air in. If I had more inclination I would probably block this up and use a light switch operated ventilation fan to freshen up the air. It works for us as it is so there is no big incentive to do this. Finding closable vents was that we liked was a bit of a challenge but we found some for £10 each.
On the subject of ventilation for rooms like bathrooms I am a great believer in ceiling mounted extractor fans. I prefer the high flow rate ones rather than the pathetic flow rate ones you can buy from DIY stores. For our bathroom we chose a Soler & Palau TD160 In Line Fan Kit kit which uses a 100mm aluminium ducting and can move 160 cubic metres of air per hour and is pretty quiet as well. It cost us about £80 but really clears a steamy bathroom very quickly. It’s a much better option than having to open the bathroom window and let loads of cold air in. The standard for 100mm fans is 85 cubic metres of air per hour and you can get one for around £40 but watch out if you are buying a cheap one – if they don’t specify a flow rate then don’t buy it.
Do be careful about blocking exterior ventilation – never block air bricks that are ventilating the area under a suspended floor or the cavity wall or you will encounter problems with damp.
7. Address any other draughts
When you are trying to get your gas bill down and make your home more comfortable then waging war on draughts is a good approach. These can generally be found pretty easily on a cold day. Hold your hand close to window and door frames, particularly at ground level and you should start to find them. Our oldish uPVC kitchen door has a black gasket seal which is compressed by the door when it is closed. The rubber gasket seal had perished over the years. We managed to find a suitable replacement gasket for the specific make of uPVC on the internet for £10.
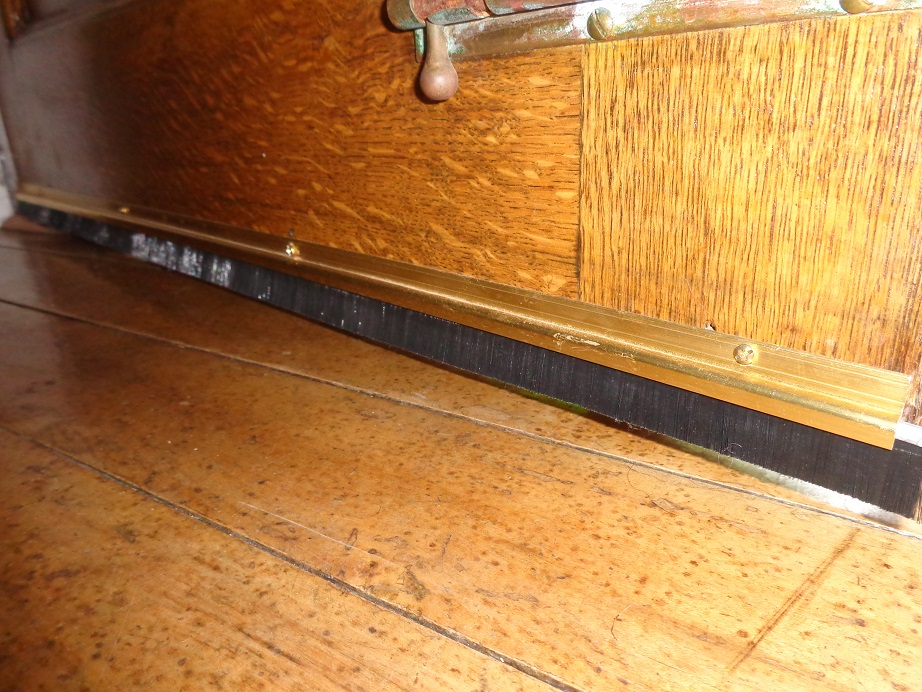
We also added a bottom of door draught excluder to our front door. This was an aluminium strip with a brush seal at the bottom and cost around £7. The other draughts we found were bigger and are described below.
As an update I came across some great thermal image shots of a draughty front door in a 1930’s house. This illustrates the problem beautifully.
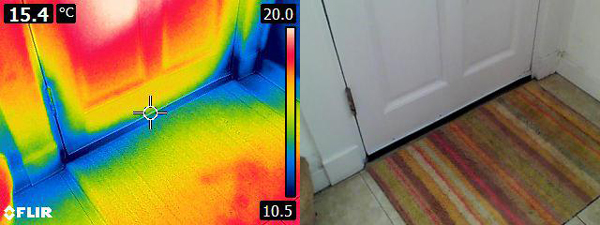
Image courtesy of Energy Expert
From the images, courtesy of Expert Energy, you can see the 10.5 degrees Centigrade temperature at the bottom of the door which is not helping to keep the rest of the house at 20 degrees Centigrade.
8. Get rid of a decorative coal effect gas fire
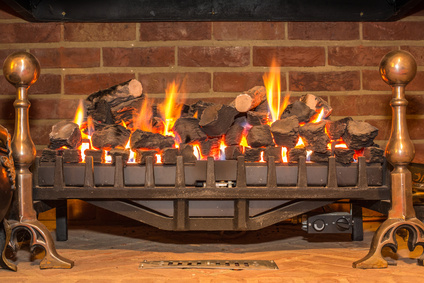
Like many people in the late 90’s we were attracted to decorative coal effect gas fires and foolishly installed one in our lounge to complement the two central heating radiators. I say foolishly because with hindsight it was about the worst thing we could have done. We opened up our boarded up fireplace and installed what we thought would be something to warm the room a little and add a little romance with an open fire. As it was gas appliance we also needed additional room ventilation in the floor. We used the fire for a little while but then realised that it didn’t add much warmth to the room at all so it fell into disuse. We were aware that the vent in the floor was letting in cold air so we put a stack of magazines over it – a little dangerous as if we lit the gas fire then the vent was needed to ensure the gas burnt safely. However we got away with it because we never lit the fire.
When we looked at replacing the gas fire with a wood burner I wanted to get the sizing right so we could buy a wood burning stove with the right kW output. So I started to try and calculate what was needed and pretty soon realised that there were two elements for keeping a room at the right temperature:
- heat loss through the materials used for the walls, windows, ceiling and floor – fabric heat loss
- heat loss caused by air flowing through the doors of the room and up the chimney – ventilation heat loss.
This was the Eureka moment for me. It dawned on me that one of the reasons why our lounge was never quite warm enough was because of the draughts as all the cold air was sucked in the floor vent and all the warm air was heading straight up the chimney. We had way too much ventilation heat loss. Simply removing the decorative gas fire and then boarding up the chimney breast and closing up the floor vent would help a lot. If this is what we had wanted to do it could have been done cheaply – paying a Gas Safe registered installer £50 to cap off the gas would have been the biggest cost. Since we had out hearts set on a wood burning stove we decided to go down this more expensive route instead.
Having looked at no cost / low cost options there were other things that we did that cost more serious money.
9. Install a wood burning stove
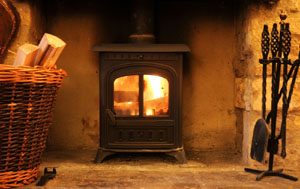
This is a big growth area as more and more people are installing wood burning stoves as a supplement to their gas central heating. We chose a 4kW output stove which cost around £2,500 to buy and install. We used a HETAS registered installer. As part of the installation a stainless steel flue is put inside the existing chimney and the space between the flue and the chimney was insulated. The fire itself was well over £1,100 although you can get some designs for £500 or less.
See wood burning stoves for more information on costs and other aspects of installing a wood burning stove.
The appeal for us was threefold:
- Firstly we could have an alternative form of heating for our lounge if the gas central heating was not working. We live in the country and do get electricity cuts from time to time. When the electricity is out then the central heating does not work either. Having the wood burning stove lets us heat at least one of the rooms and boil a saucepan of water for drinks if this happens.
- Secondly it provides some heat in autumn evenings and in the winter during the day without having to switch on the central heating. Having the wood burning stove just takes the edge of the cold in these situations. It pushes back by a few weeks the time when we switch on our central heating as winter approaches. The warm air from the lounge finds its way upstairs so the bedrooms are pleasantly warm even with just the wood burner being used. Also the chimney runs through our bedroom and the brick chimney does provide a little heat there as well.
- Thirdly there is something relaxing about staring at the red embers of a wood fire. Of course you have to light the fire and clean it out from time to time but actually we find it fun to do. It’s maybe not for someone who wants everything at the touch of a button but it does give you a greater sense of self-reliance.
We buy wood by the pick-up load and spent around £75 per load of barn dried wood ( I am reliably informed that a load is about 1.1 cubic metres). In a 12-month period we spent around £300 but I must confess that for that our lounge was piping hot and probably nearer 24 or 25 degrees centigrade.
10. Insulate suspended floors and prevent draughts
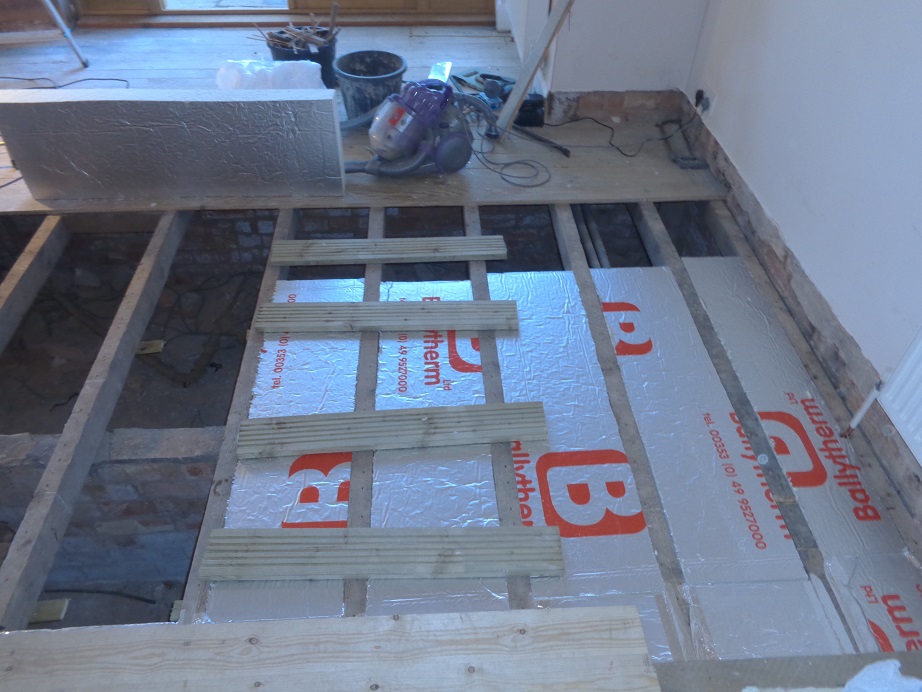
When we had our wood burning stove installed and the room was piping hot we then noticed that when we sat on the carpet it still felt cold to the touch despite the warmth in the room. The suspended wood floor in the lounge has taken a bit of a hammering over the years with installers accessing underneath to re-wire the electrics and run new central heating and gas pipes so there were a few gaps in the tongue and groove flooring which were letting cold air into the room from the floor space below. So after some consideration we started looking at under floor insulation.
We opted to insulate the floors with Celotex PIR thermal insulation board, this time using 100mm thickness in most places and 50mm where the thicker board could not be used as it would block ventilation. In the lounge we pulled up all the floor boards (not at all easy with tongue and groove floorboards I can tell you) and used the insulation board between the joists. We sealed all the gaps with fire rated foam filler and then taped any joints between joists and boards with aluminium tape. Then we replaced the floorboards. We could have replaced the ageing carpet but decided to go for a new oak floor which was laid, by a professional, over the original floorboards. See Insulating A Suspended Timber Floor From Above Floor for more details.
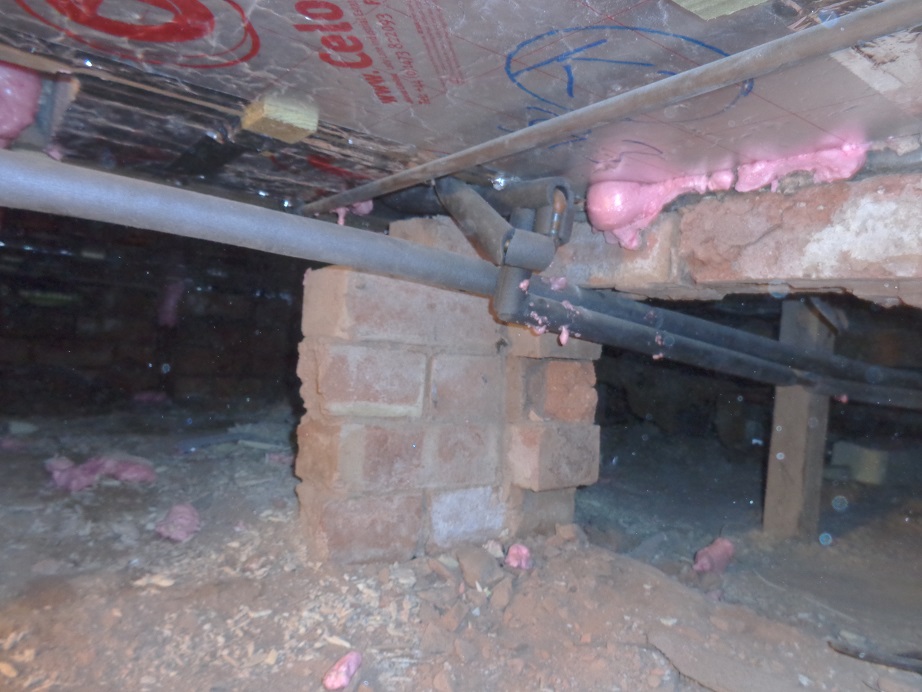
The insulation seemed to make such a difference in the lounge we decided to do the remainder of the ground floor of our house. Pulling floorboards up was not an option in the other areas as we either had vinyl flooring (posh lino) laid over floorboards or the original oak flooring. So I opted to insulate from underneath the floor which involved crawling in the cavity under the suspended floor. We were lucky that there was enough room and I figured out a method of measuring and cutting the insulation boards outside before dragging them under the floor and fitting them between the joists. This was hard work but not as hard as ripping up and then refitting tongue and groove floorboards. We must have spent around £600 on the insulation board and other materials and it took me a couple of weeks to do but we ended up with a very well insulated floor and a house that felt much warmer. We didn’t insulate our dining room floor as it quickly became clear that our Labrador was looking for somewhere cooler to sleep as the rest of the house was too warm for his liking. See Insulating A Suspended Timber Floor From Underneath The Floor for details.
This would have cost a lot more if it had been done professionally – I would guess close to £2,000 and you do need crawl space under the suspended wood floor. If I ever moved into another old property it would be one of the first things I would do as it made such a big difference. There are government grants available to do this from time to time so it is worth checking what is on offer before going ahead with this type of work.
Having insulated the floor we are uncertain how much this has contributed to our gas savings compared to the wood burning stove. My opinion is that most of the benefit has come from the floor insulation. If we had not installed the wood burning stove we may not have realised how draughty and cold the floor was though! The insulation was only completed in mid-January 2014 so we have not seen the full benefits of it yet.
So having taken those 10 steps what did we learn?
There was no master plan or target for these savings. As we took each action it often led to a realisation that other things were possible. With hindsight some of the actions we took may not have reduced our bills much, such as installing a wood burning stove, but they have increased our comfort level and the warmth of the house instead. We think of this experience as a journey with each completed action prompting us to do something else.
We did track daily gas usage for a period of time whilst also recording the minimum outside temperature each day so that we got a feel for what it should cost each day and then compare with similar days pre and post the actions being implemented. However as there was no direct comparison with the previous 12-months it was not a precise science and it was hard to separate the specific benefits of individual actions. There were fewer draughts and the bill went down so we were happy enough.
Summary of Savings
Our gas bill has reduced from a potential £2,070 per year (year ending June 2013 usage adjusted for the 8.4% price increase that British gas put through in October 2014) using 38,900 kWh of gas to £970 per year (year ending June 2014) using 22,400 kWh of gas. This is a saving of £1,100 or 53% in value terms and 16,500 kWh or 42% in energy usage terms. This annual saving will be slightly more for a full year as many of the measures were implemented part way through the year – we didn’t have the underfloor insulation completed until mid January 2014. January-March 2014 was not as cold as the same period in 2013 so we would also make an allowance the other way for greater gas usage in a colder winter. I would guess that these two factors would probably balance each other out. The savings we have achieved show us that, for a 1930’s home-owner, reducing energy usage overall had far more impact on the gas bill than getting the best deal on buying gas. Doing both is the best option.
We spent £300 on wood during the year so our net annual savings are likely to be £800. To achieve this annual saving we spent around £3,500 in capital spend with the biggest spend being on the wood burning stove. So it would take us round 4 and a half years to get payback on our original capital spend. Bear in mind that our home is now warm as toast rather than a little bit chilly and that in my view the £2,500 spend on the wood burning stove could probably have been given a miss without a big impact on the fuel savings made. This would bring the insulation spend down to around £1,000 and probably give a payback in less than two years.
We could compare our gas usage with similar properties by using information from the National Energy Efficiency Database (NEED). For our type of property the NEED average is 29,400 kWh per year. So adding around 8,500 kWh (£300) of equivalent wood usage to our 22,400 kWh of gas means we are now around 30,900 kWh or just above the average.
What next?
We have just had an EPC assessment (Energy Performance Certificate) as we are planning to sell our house and this gave an EPC rating of 63 which is not bad for a 1930’s house. We could boost it to a 73 rating by having cavity wall insulation at a cost of about £800 but I am anti doing this as I have read various horror stories about damp problems caused by blowing insulation into cavity walls. We are happy with the overall warmth and cost of heating our home. We would consider external wall insulation (where the insulation is added to the outside of the house) if we could get a government grant for this. This is mainly for houses with no cavity wall and can cost upwards of £5,000 so it is a much more expensive option but for me is the best option for the future.
I hope this article gives you some help in bringing down your own gas bill. Please do add a comment if you have other suggestions for achieving this or want to share your experiences with others.
Leave a Reply