In recent years there has been greater interest in rainwater capture or rainwater harvesting systems. A rainwater capture system collects rainwater falling on your roof, filters it and diverts it into a rainwater storage tank and then pumps it around the house for use in flushing toilets, supplying outside taps or in some cases washing machines.
What are the benefits of a rainwater harvesting system?
Storing rainwater for later use can reduce water and sewage bills and allow you to water a garden during a hosepipe ban with gentler rainwater rather than treated tap water. Using rainwater in a washing machine can also reduce the usage of softeners.
In a four person household you are likely to reduce your mains water consumption by around 30m³ or around £60-90 per year on toilet flushing alone (30,000 litres per year assuming 4 toilet flushes per day per person with a 5 litre flush and water and sewage costs of around £2-£3 per 1,000 litres depending where in the country you live). A garden hose can use 500 to 1,000 litres per hour so watering the garden can easily use as much again if there is no hosepipe ban, giving a total saving of around £120-£180 per year or £3,600-£5,400 over 30 years at today’s prices.
How much does a rainwater harvesting system cost to install?
It is much easier to install the system in a new build house or when a house is having a major renovation as access is simpler and equipment to dig out earth below ground for the storage tank is likely to be already on site. A new build installation could cost around £3,000 for a 2,500 litre system and around £3,500 for a 5,000 litre system. Add £500 for each additional 2,500 litres of storage. An installation in an existing house, working around existing internal decoration and external landscaping to run plumbing and wiring, could add a further £1,000 as a stand alone job.
Based on the cost and the benefits the financial payback can be measured in decades rather than years but as a major project it is certainly worth considering, especially in places with scarce or intermittent water resources. In some areas of the country you may struggle to get planning permission for a new house if it places too much demand on treated mains water.
How does a rainwater harvesting system work?
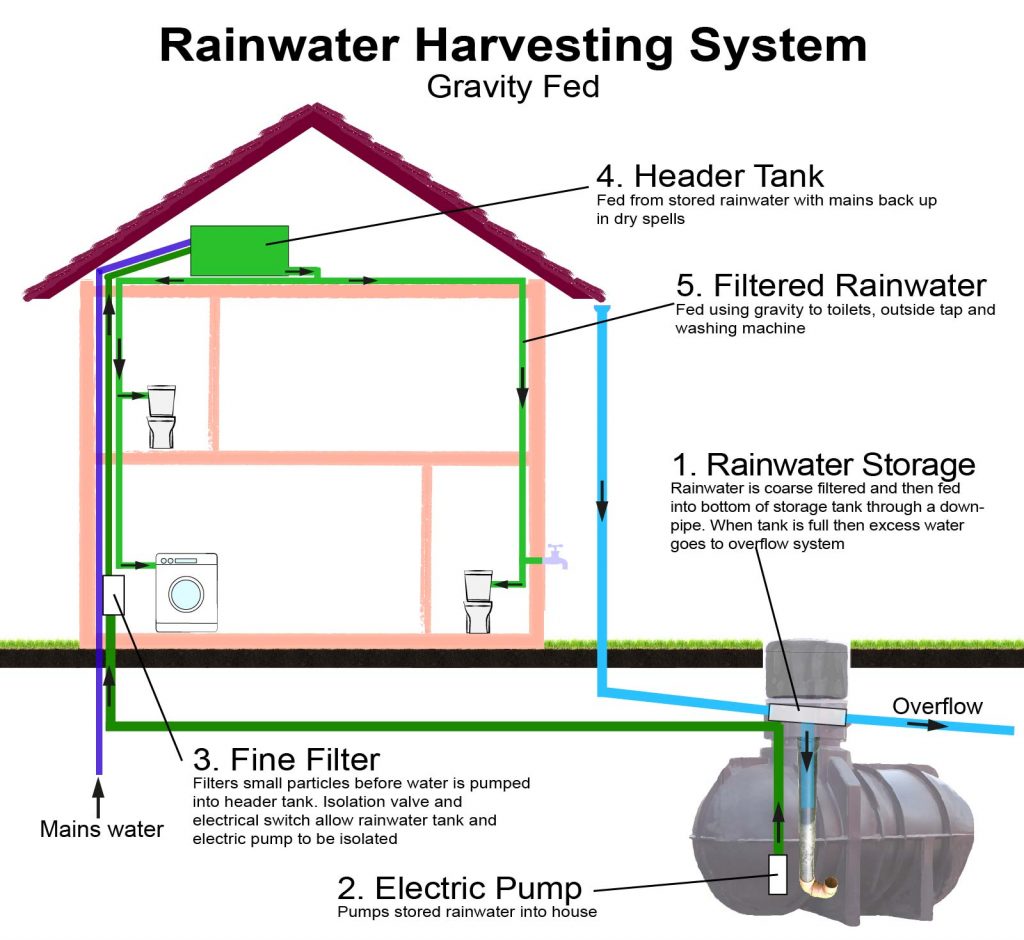
The main elements of a rainwater harvesting systems are:
- A rainwater storage tank, often buried underground
- A pump to pump the stored rainwater into the house
- Filters to remove any particles suspended in the rainwater
- A header tank (for a gravity fed system) to distribute water around the house
The graphic below shows the basic principles of a rainwater capture system, with gravity feed and a storage tank in the loft. Direct pressure systems are also available with the rainwater plumbed directly to appliances rather than going via a storage tank.
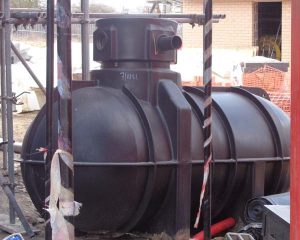
Rainwater Storage Tank
Storage tanks are generally of plastic construction (polyethylene) and are often ribbed for strength so they can be buried underground. Tanks come in different sizes from around 1,000 to 10,000 litres and are designed for non-potable water; that means tanks are not suitable for storing drinking (or potable) water unless they are WRAS approved for this purpose.
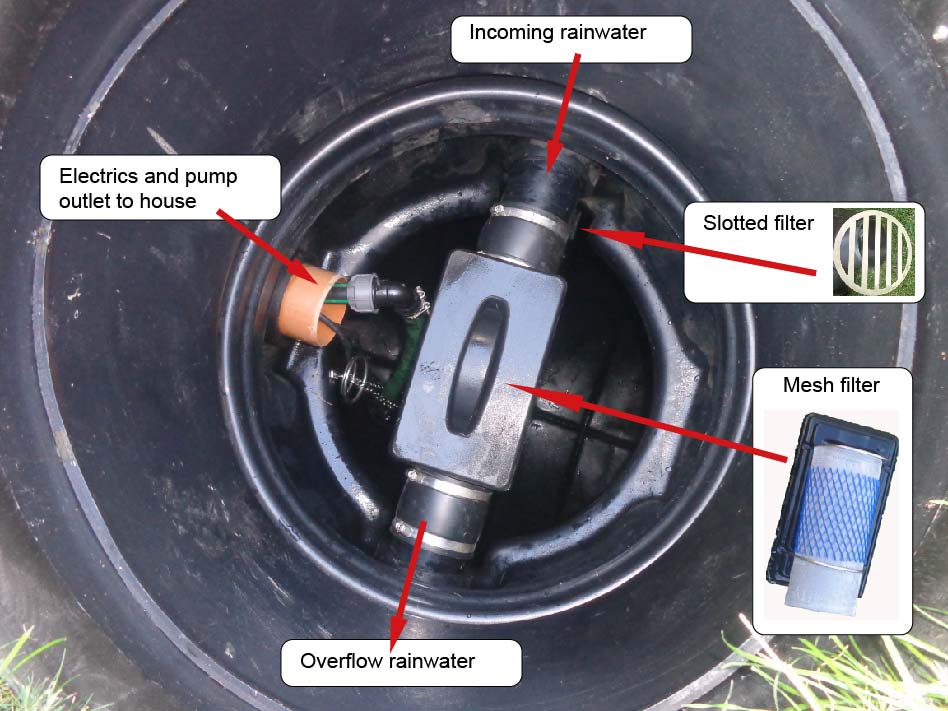
Typically there are a number of filters used in the system to prevent debris getting into the storage tank. The first is a leaf filter in the house guttering near the downpipe that feeds the rainwater harvesting system. The second is often a slotted filter (see picture below) which is fitted into the rainwater supply pipe and will block debris bigger than about 10mm in size.
A third filter is a mesh filter which allows water and anything less than about 1mm in diameter to feed into the bottom of the storage tank. Anything bigger than this will be held in the filter and then eventually flushed to the overflow when the tank is full. These filters should be cleaned at least annually.
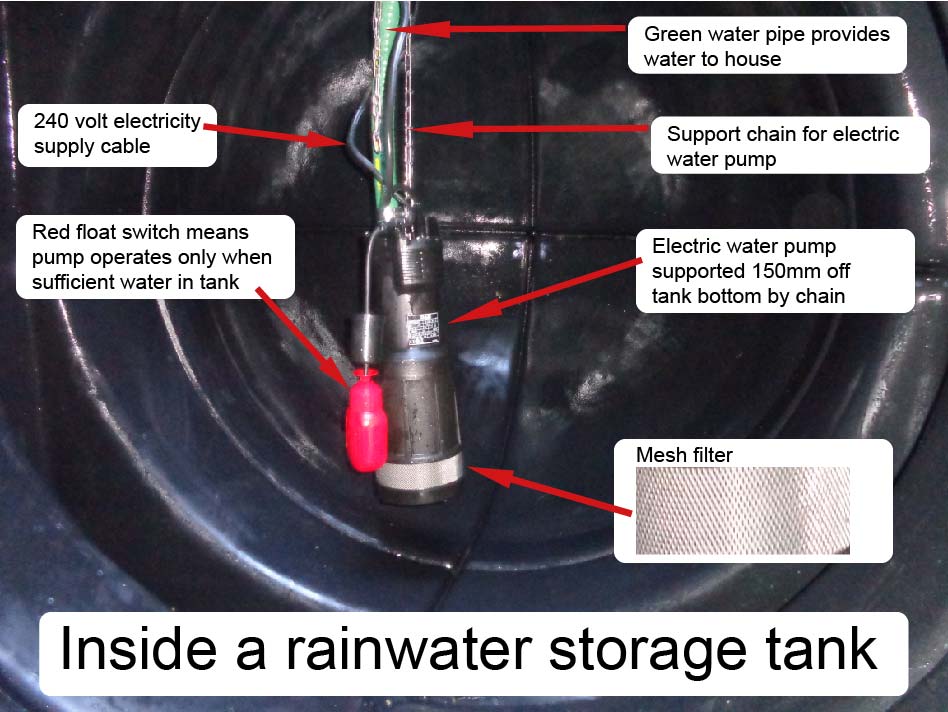
Electric Water Pump
The water is pumped into the house using an electric pump through a large diameter pipe. The pump has a mesh filter to strain the stored rainwater and is suspended on a chain about 150mm (6″) from the bottom of the tank. A float switch is used to control the electric supply; the water pump will only be activated if there is sufficient water in the tank to lift the float which then turns on the electrics.
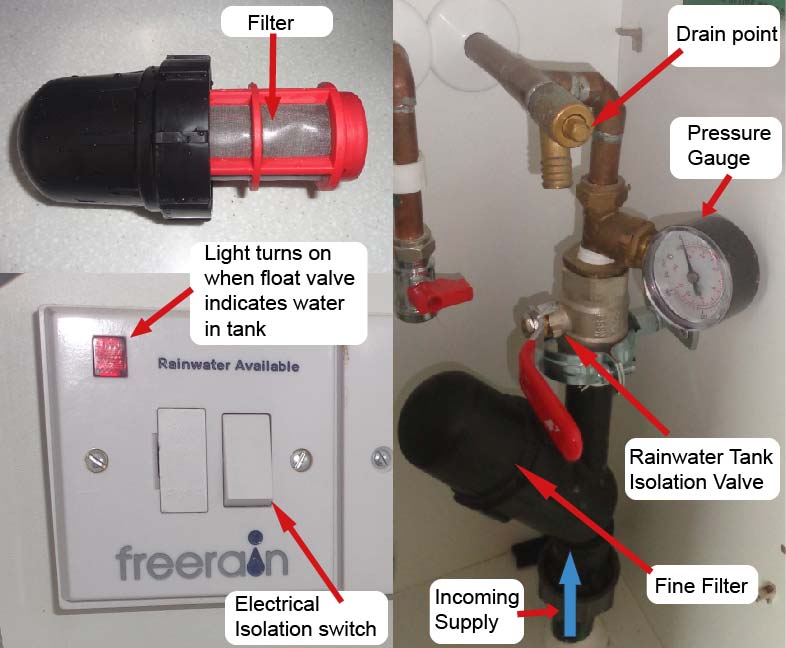
Fine filter and isolation valve
Within the house there is a fine filter followed by a rainwater tank isolation valve along with a water pressure gauge and a drain point. Located in the same area is an electrical switch which isolates the electricity to the pump in the tank. The filter should be washed out every 3 months or so.
Header tank in loft
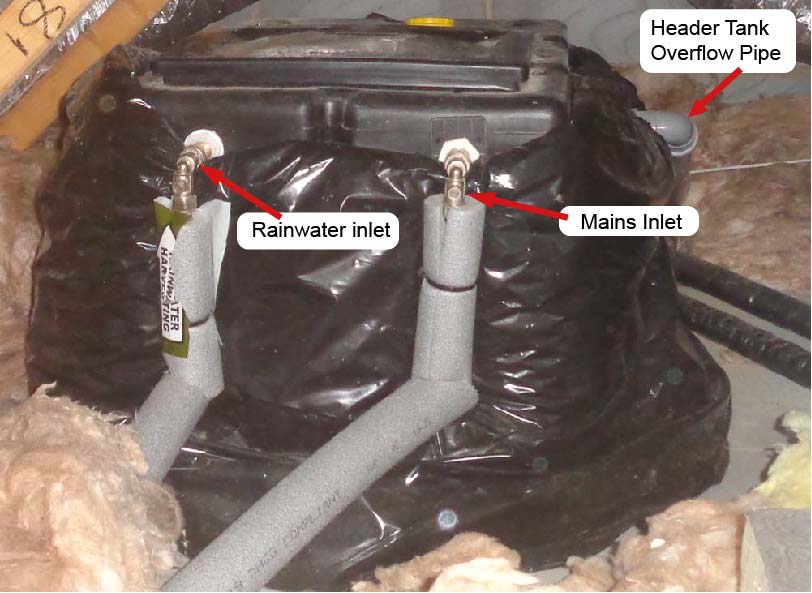
The header tank is used to distribute filtered rainwater to the rest of the house using gravity. It has two inlets, the rainwater ball valve is set to a higher level than the mains water ball valve. This means that mains water is only used if there is no rainwater available. The header tank is sealed to avoid dust falling into the tank and is lagged to avoid freezing. Each inlet has a valve on the outside of the tank, to allow it to be isolated if required. There are three outlets, a feed for the rainwater and two overflow pipes for the tank in case of a problem with the ball valves (the larger one is the fail safe wisely insisted on by the waterboard).
What Maintenance Is Required?
The filter in the house should be cleaned every 3 months and the other filters in the storage tank every 6 months or so with a visual inspection of the storage tank and the header tank annually. Every 3 to 5 years the storage tank should be fully drained for cleaning.
What Can Go Wrong With A Rainwater Harvesting System
Assuming the system is professionally installed and with periodic cleaning of filters and maintenance there is very little to go wrong with the system. In my own system the only problems have been with sticking ball valves in the header tank which meant that the system was using mains water for a period of time rather than rainwater. We could tell the difference as when using mains water you could hear the tank filling up; the rainwater fills the tank to about 75% capacity whilst the mains water is set to fill it to only 25% so there is much more of a splash when the header tank is filled.
Practical Aspects of Maintenance (Added August 2018)
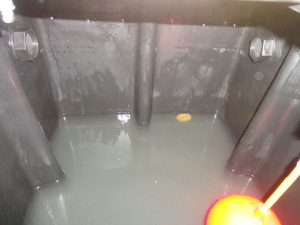
With the UK experiencing a hotter than average summer, our rainwater tank emptied, as little rain fell for a 6-8 week period and the loft header tank switched to mains water fill. Water stagnated in the rainwater storage tank for upwards of 8 weeks. Once the rain came, not only did it sweep all the dust off the roof and into the rainwater tank (fine particles below about 0.75mm in size) but the material that had settled in the small amount of water was churned up and fed into the loft header tank. The water being used for flushing toilets turned a sandy colour and started to give off a swampy sulphurous smell. Time for some maintenance!
1. The rainwater pump isolation switch was turned off, to switch back to mains fill.
2. The loft header tank and toilet cisterns were cleaned:
- a: Cold water was turned off to prevent header tank from filling
- b: The water in the header tank was removed by simply running a garden hose until water flow stopped. The hose tap was left open and the hose outlet put in a bucket
- c: A visit to the loft header tank was made and the mains water feed isolated so the water could be turned back on to the rest of the house (this isolation valve could have been used initially but access to the loft tank is quite difficult so it saves a journey)
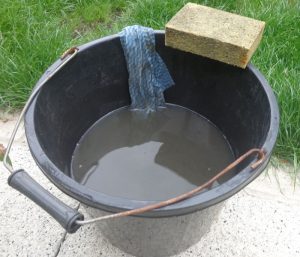
- d: The remaining water in the loft tank was scooped up with a small plastic jug and poured into a bucket. When the jug was no use, a sponge was used to remove the last 10mm or so of water. The bucket was about half full of murky water
- e: The inside of the tank was then rubbed down with the sponge and a cloth to remove a slight brown stain that had formed
- f: A quick trip out of the loft disposed of the murky water in the bucket and allowed the mains water to be switched back on
- g: Returning to the loft tank, an anti-bacterial spray was used on the inside of the tank, again with a quick rub down
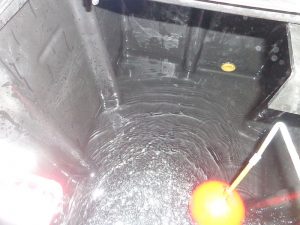
- h: The mains isolation vale was opened again, allowing some water to start to fill the loft tank. The isolation valve was then closed and the water in the tank swilled around to remove the anti-bacterial spray and to make sure that the sides of the tank were clear of any remaining fine particles.
- i: As the hose outlet had been left open the water level in the loft tank gradually fell below the outlet level
- j: The remainder of the water was again removed with the jug and sponge into a bucket, leaving it empty.
- k: With the loft tank clean, the inlet valve was opened and the tank started to fill again
- l: Descending from the loft, the hose was turned off and the water in the bucket (with a small concentration of anti-bacterial spray) disposed of
- m: The cisterns of each of the toilets were then individually cleaned and flushed a couple of times to allow any fine particles to be flushed into the toilet pan
Equipment used:
- Lights to work by in loft
- Screwdriver to isolate valve on loft tank
- Bucket
- Small jug to scoop water with
- Sponge to mop water with
- Cloth to wipe inside of loft tank
- Anti-bacterial spray
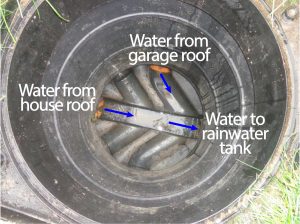
3. The manhole cover for the inspection chamber was removed and about 10-15mm of debris (fine mud) in the channels was cleared.
4. Next step is to clean the rainwater tank. Due to other commitments this will be done in September (and will be documented) and mains water only used until then.
