For those considering whether to insulate a suspended timber floor, this article describes our experiences installing PIR thermal insulation board by removing the floorboards and insulating from above the floor. (Celotex and Kingspan are two well known brands of PIR insulation board).
The first step in the process is to clear the room of all furniture, curtain and carpets. It’s going to be a messy activity so make sure you do it before you redecorate rather than just afterwards!
Getting up the floor can also be quite a challenge, especially if it is built with tongue and groove floorboards.
There are techniques for getting these up undamaged but it’s quite an art and one I haven’t yet mastered.
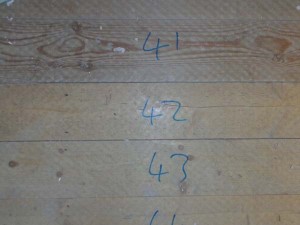
Numbering the floorboards before you start removing any is a good idea. I used a marker pen and marked them on the top. If the floorboards are going to be visible when you have finished then number them on the underside as you remove them. In either case it will make life easier when you come to replace them.
Since we were putting down a new oak floor on top of the existing floorboards, I went for a speedy approach to removing the boards.
Cut between the boards, through the tongue connecting each board to its neighbour.
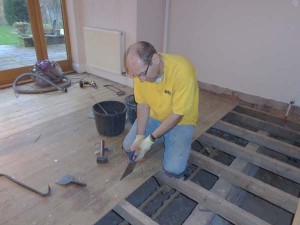
I used a floorboard saw which is specifically designed for this purpose; the Stanley Tools FATMAX® floorboard saw costs around £13 and is well worth it. Once the tongue had been cut it allowed me to lever up each board separately.
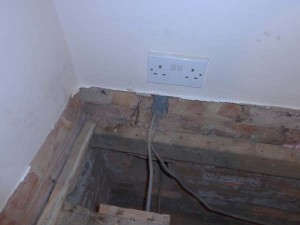
Do be very careful as you remove the first couple of boards, as you need to make sure you don’t cut through any joists, pipes or cables that are running under the floor.
Once you have got one or two floorboards up it is easy to visually check for cables and pipes.
If each floorboard goes the full width of the room then, as the floorboards extend underneath the skirting board, you will have two options. Either cut the floorboards in half at a joist and lift them or remove the skirting completely. You could well be lifting 50 or more floorboards so it’s worth thinking about the best approach for the entire room.
We planned to replace the damaged skirting anyway so it was an easy decision to remove it. It also allowed us to repair some of the wall plaster that had been damaged over the years. The old skirting was attached with nails hammered into pieces of wood recessed into the brickwork. As we pulled the skirting off it did pull a small amount of mortar with it but this was easily repaired.
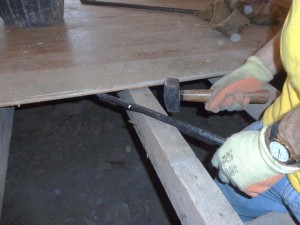
Once the tongue and groove had been cut a combination of a lump hammer and a crowbar was used. Hitting the board from underneath allows you to prise the board higher with the crowbar.
I started with a bigger crowbar but soon switched to a much smaller one as the floorboards were about 80 years old and the force generated by the bigger crowbar was damaging them.
Sleeper Walls
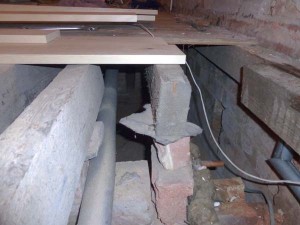
Every 2 metres or so a sleeper wall was encountered (at a right angle to the joists) on which the floor joists were supported. Some of the sleeper walls had been damaged when pipes for the original central heating system had been installed so they needed some minor brickwork repairs to allow the joists to be properly supported; it explained why the floor had been bouncy in places, especially as one joist had been balanced on two loose bricks.
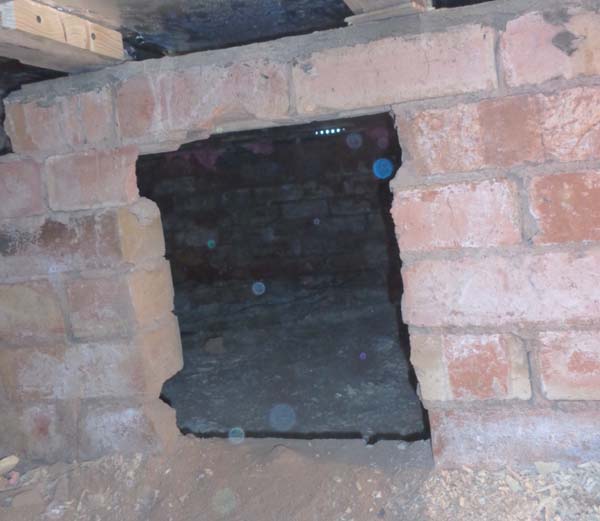
The sleeper walls have air gaps in them to allow good airflow in the sub floor area.
The sleeper walls also had crawl access to other parts of the floor area – something that came in handy when we decided to insulate other rooms from underneath the floor.
Once 3 or 4 boards past the sleeper wall were removed I started to insulate. You can just remove all the floorboards in a room first and then insulate but I was working on my own and found it easier to work in sections. Also I had left a particularly heavy 3 seat sofa in the room and needed somewhere to move it to as I got closer to it.
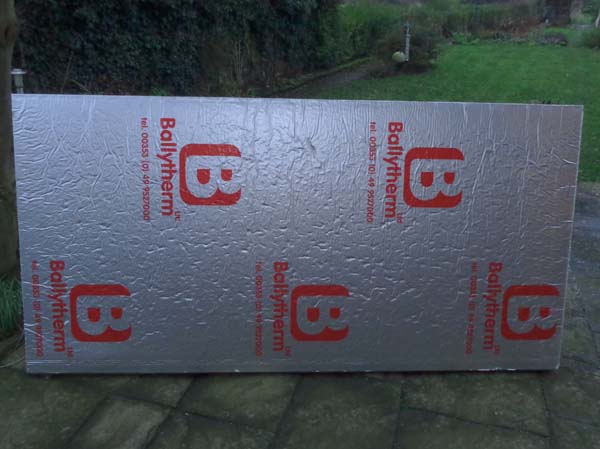
I chose PIR thermal insulation board, often referred to as Celotex or Kingspan insulation.
This comes in 1.2m x 2.4m sheets and in 50mm and 100mm thicknesses. The majority of the boards were delivered in bulk by a builders merchant. At the end of the project a small number of boards were purchased from a local DIY store but they did have to be cut down in size in the car park before they would fit in the car.
Reading the information on manufacturers’ websites showed that the PIR thermal board could be installed directly under the floorboards with no other materials required. This is because the boards are faced with aluminium foil. So there is no vapour permeable membrane or a vapour control layer required; you could need one or other of these if using other insulation materials and depending on the installation method.
It is important to cut the insulation board accurately to size, as a key part of the insulation process is to prevent underfloor draughts from blowing into the room above. An air tight joint is what is needed. Our joists were not particularly well spaced and were certainly not parallel with each other so I chose to cut 1.2m sections of insulation as an amount of trimming was required to fit between the joists. Generally there was a 10-15mm difference in the joist spacing over a 1.2m length. Also there was trimming where the end of one joist and the start of another joist sat on the sleeper wall next to each other so it was easier to handle smaller pieces.
Cutting PIR insulation board is pretty easy although it is best done outside and with a protective mask as it is quite dusty. I measured the width of board I needed and marked it on the board using a biro and a length of wood to keep the line straight. The board can be cut through with a handsaw with minimal effort.
There are two methods of fitting the insulation:
- using battens fixed to the underside of the joist which the insulation rested on
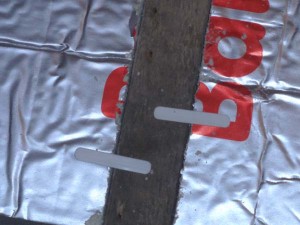
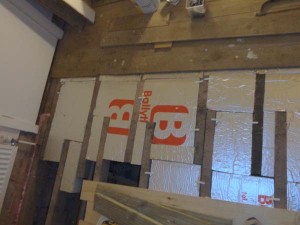
- using special Celotex insulation clips which pushed into the side of the board. The clip then sit on the top of the joist
The batten method worked better for me as there were times when the insulation clip damaged the side of the board as it was pushed past the joist. It may have been the way I installed the insulation, which was to lay it between the joists and then bash it gently on each side with my hand; this gently forced the board down until it was flush with the top of the joists.
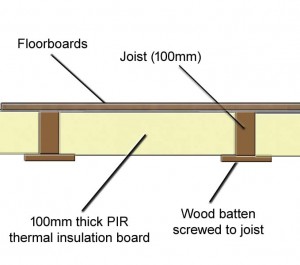
The battens were made from some spare treated 45mm x 10mm timber which were cut into about 100mm lengths. If I hadn’t had the spare timber I would have used roofing battens. The battens were screwed at right angles to the joists, which meant each batten supported insulation on either side of the joist. Three support points were used either side of each 1.2m length of insulation, one at each end and one in the middle of the board. I have read that the batten should run continuously down the joist supporting the insulation along the whole length but this seemed unnecessary to me; my method of using battens is similar to the method advised by Celotex for their plastic clips.
Once a section of floor was insulated then I filled any big gaps between the joists and the insulation with fire resistant expanding foam. The foam should be left to set (20-30 minutes) and any excess foam can then be cut off. Don’t handle this stuff when it is wet as until it is set as it is very very messy and will stick to hands, hair and everything else. If you drop some foam accidentally then the best thing to do is let it set hard and then cut it off using a knife. If you get it on your hair or clothes, let it set and it should just break off without leaving a sticky mess.
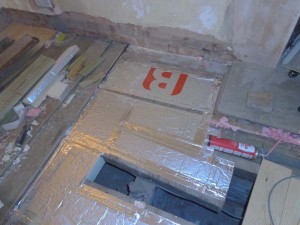
Once any foam is set, use aluminium tape to seal between joints in the thermal boards. I also aluminium taped between each joist and the board. I am not sure whether this is strictly necessary but I wanted to make sure there was no risk of any draughts getting through.
You may find yourself having to cut insulation to fit round things like fireplaces and other odd shapes. You will soon get the hang of it; this is where battens are much easier than the plastic clips for support as you can build up in the insulation in pieces and then fit it all together.
With a suspended timber floor it is important to keep the space under the floor well ventilated to avoid damp build up. As you install the insulation it’s worth taking the time to check for damp and to make sure that all the air bricks providing air are free of any obstructions such as old plaster, mortar or even spiders webs. If you find any damp problems this is a good time to fix them.
We found some air bricks were at the same height as the joists. This caused two problems; the airflow was already partially blocked by the joist itself; also we clearly couldn’t install 100mm thick insulation right next to the air brick. So we moved the joist around 75mm further away from the wall to allow better circulation and then fashioned a bespoke angled piece of 50mm thick insulation to still allow good air flow under the floor but stop it from coming into the room above.
I didn’t want to block airflow over the sleeper walls that the joists were resting on so we used 50mm thick insulation for about 0.3m either side of the sleeper wall, rather than the 100mm thick board. The sleeper walls had other holes built into them but I thought that sacrificing a little insulation was worth it to maintain a well ventilated under floor area.
As the room was already cleared, the opportunity was taken to skim plaster the walls and to replace a few badly damaged floorboards. A local timber merchant was used to cut new floorboards to the right width and to plane tem to the right thickness to match the original 1930s boards; these were very different to the standard timber sizes available today.
An adhesive masonry tape was used to form a seal between the bottom 25mm of the walls and the insulation; this was to eliminate draughts.
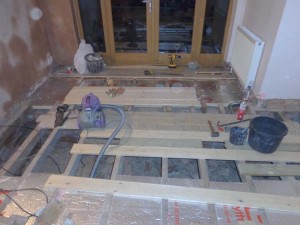
As the floorboards were replaced (in number order), they were screwing down rather than nailed using a cordless screwdriver. New skirting board was then fitted; this was glued rather than nailed to the walls.
As access to under floor services such as electric cables and central heating pipes may be needed in the future, a hatch area was built in the floor. This allows easy access without having to damage the new wood floor that was being put down. An area for the access hatch was chosen that was likely to be under furniture so it is not visible. With hindsight the access hatch was very generous and could probably have been close to half the size but it did make it easy to get thermal board insulation through it when it was decided to insulate the rest of the ground floor; from underneath this time.
The end result was everything we could have hoped for. Once the new oak floor had been glued down and two coats of emulsion applied to the walls and ceilings we had a clean room that was warm and draught free; there is no longer dust on the skirting boards where previously dusty air from under the floor had blown in. Not only is the room much warmer, particularly when you sit on the floor, but the insulation has contributed to a big reduction in our heating bills. See Ten Steps To Saving £1,000 On Our Gas Bill for details.
This is just one method of insulating a suspended timber floor from above. It worked for us but I am sure other people may have come up with a better method. We would be delighted to hear your comments, queries and suggestions for improvement.
I have a suspended wood floor (ground floor) in an old 1930s build that I am retrofitting floor insulation. I want to use PIR board, I know Kingspan have a fitting guide where they talk about cold bridges at the joists. I am wonder since there is a good 2.5foot height in crawl space, is it ok to fit entire PIR boards by lifting up floor boards in corner of room and taking entire PIR into crawl space, using battens through board and into joists from below. I feel it is easier to fit this way since the boards dont then need much if any cutting. It does mean the height of the joists air gap between insulation and floor boards but that leaves it free for pipe work and additional wiring.
I want to make sure there is evidence for EPC, assessor already said receipts for insulation not good enough. What would you suggest for this?
Hi
Firstly a great guide and pleased I found this.
I am wondering if you can also use this method to insulate a roof between the joist. There are lots of guides for doing between the rafters but nothing more than a passing comment about using them in joints.
I was thinking of using PIR boards between the joist (100mm joinst) and then adding a second layer of 100mm boards across the joist before boarding over the top for storage.
My questions are :-
1) is this a good idea or should I just do the normal loft insulation ?
2) Do I need any air gaps ?
3) What do I need to look out for as I go into the eaves ?
4) how do I deal with electric cables ?
Many thanks
Hi, thanks for a very helpful article. I am doing a similar project. The only thing I’m a little worried about is if there were to be any natural movement (eg. expansion/contraction) of the joists. Once the Celotex is fitted, and any gaps are filled with expanding foam, and joints are all taped – what happens if there is any movement in the joists? Presumably gaps would open up?
Thanks.
Hi Clare,
It’s not something I have heard great mention of, either as a problem or as something manufacturer’s suggest should be considered at installation stage (The BEIS Guide to Best Practice Retrofit Floor Insulation – Suspended Timber Floors could be considered the best overall reference). The insulation does need to be held in place (either with battens or Celotex do a plastic clip that supports the insulation). A friction fit can not be relied upon and installers do sometimes end up using some expanding foam to cover cutting mistakes.
The alternative is to use batt type insulation which has a little more give in it – this can accommodate variations in uneven joists etc.
Hope this helps and all the best with your project.
Kind regards
Jon
Hi Jon
You state in your article: “We found some air bricks were at the same height as the joists. This caused two problems; the airflow was already partially blocked by the joist itself; also we clearly couldn’t install 100mm thick insulation right next to the air brick. So we moved the joist around 75mm further away from the wall to allow better circulation and then fashioned a bespoke angled piece of 50mm thick insulation to still allow good air flow under the floor but stop it from coming into the room above.”
We have the same situation where 3 airbricks are directly in line with the joists running in parallel with the inner skin. Can you explain how you moved a joist? This does not seem possible to me. Do you mean you cut the ends of the joists nearest to the air bricks?
Thank you.
Hi Sandra,
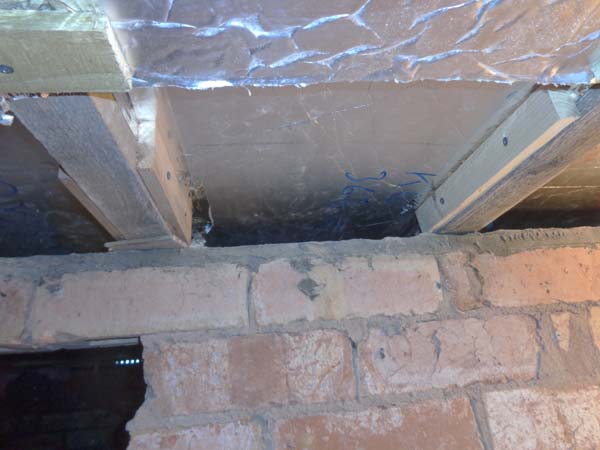
It depends on how the joists are fixed. If they sit on a sleeper wall with a slate/mortar bed then they can be adjusted if the nails in the floorboards are removed. Some older houses have the joists held in brick pockets – by shortening them and using joist hangers instead these can also be moved. The whole joist can then be slid 50-75mm away from the wall and the insulation can be tapered so there is still airflow through the vent.
Haven’t got a great shot of a joist on a mortar bed but see this image which shows reduced thickness of insulation to allow airflow over a dwarf wall.
Another option would be to use a telescopic air vent – essentially a Z-shape – which would drop the air brick outlet down 3 or 4 brick courses.
Hope this help.
Kind regards
Jon
Hi Jon, this article has helped me a lot! Can i ask do you butt the insulation right up to the brick work? Or do you need to leave a gap? I guess im worried that if any damp gets into my brickwork, it will be able to bridge into the insulation. Any advice is greatly appreciated.
Hi Lorrie,
It would to some extent depend on the insulation material you were using and how “damp” your external walls get. Some insulation materials such as PIR board or expanding foam are pretty resistant to damp, due to the structure of their materials but others are a little more vulnerable to damp. That is not to say you should not use them. The BEIS “Guide to Best Practice, Retrofit Floor Insulation – Suspended Timber Floors” sums it up well:
If I was keen on using an insulating material which was less resistant to damp then I would probably consider using a damp proof jointing tape that could stick to brick / blockwork to avoid direct contact.
Hope this helps.
Kind regards
Jon
Hey, this was really helpful . I was wondering what you did with the electrical cabling that ran through the insulation. We have cables all running up from the floor void and worried that the addition insulation around the cables may increase the heat and potential for short circuit/fire?
Hi Matt,
Covering electrical cables with insulation will potentially increase the temperature of the wiring and reduce the current carrying capacity. If the actual load is regularly close to the current carrying capacity of the cable then problems can arise.
Best practice would be to use conduit for short runs through the insulation (say 150mm of insulation) and make sure the conduit is fixed to the wall so that the conduit is not fully surrounded by insulation. To be doubly sure, you can calculate the cable size needed to cope with the planned load running through insulation and check if the existing cable is still suitable. You can do a rough check on the planned load by looking to see what the ampage of the mcb (miniature circuit breaker) for the circuit is at the consumer unit. A number of cable suppliers offer online cable size calculators. As an example of the issue, running a cable surrounded by insulation for 100mm you may derate the capacity by 0.81 (i.e. it can only carry 81% of its rated uninsulated load) but if it was running through 500mm of insulation then the capacity would be derated by 0.5 (i.e. it can carry only 50% of the current it could in an uninsulated state). Issues with cable sizing are less likely to come into play in a cold sub floor with a 150mm length of vertical cable running through conduit surrounded by insulation than say a 5 metre length of horizontal cable suddenly being covered in 300mm of insulation when insulating a loft, but it is certainly worth checking. Cables that carry a high load such as cookers and electric showers are most vulnerable to overheating. If unsure then do consult a qualified electrician who can advise you if any short runs of cable would need to be upgraded.
Hope this help.
Kind regards
Jon
Hi Jon,
Thanks for the informative article.
One thing I’m not clear about though is how you attach the support battens to the underside of the 100mm joists for the 100mm PIR thermal insulation board to then sit on? Without a crawl space providing access from below, I’m struggling to work out how this could be achieved from above?
In my case, my joists are 100mm deep (4 inches in old money) and I was thinking I’d have to attach 2″ x 1″ battens to each side of each joist and, in consequence, I’ll only be able to fit 75mm PIR thermal insulation board. Presumably, I’ll lose 25% of the benefit and efficiency that I would have got by installing 100mm board.
Regards,
Tim.
Hi Tim, thanks for the feedback.
I did try a number of different options.
a) Celotex do an insulation clip (See celotex.co.uk/products/insulation-clip) but I found that these did not always give the support needed and could tear the insulation a little when I had to cut it or if they got “leaned on” accidentally.
b) An alternative solution which allows you to use the 100mm board, if you have sufficient access, is to screw short pieces of batten at right angles to the underside of the joist at the ends and every 2ft or so in between; 6″ length so 2″ protrudes either side of the joist. The boards can be rested on these. There is no weight in the rigid board (hence the Celotex clip solution) and the battens are purely there to stop them moving if things expand or contract. This is effectively one solution if you were fixing from underneath.
With both of these options, there is still an issue with small gaps between the joists and the cut board; I used foam filler which worked fine. Since I did the floor insulation other products have appeared on the market such as Gapotape (See gapogroup.com) which takes up any variations. I haven’t used it but have seen it demonstrated and it appears to provide a friction fit. It makes installation easier but at a price.
c) From a practical perspective I personally wouldn’t be too concerned about using 75mm board with the batten solution you are suggesting, unless there is a specific building regs requirement you need to meet. Yes there is some increase in thermal losses but with suspended floors the biggest issue is generally ventilation losses; the howling gale that finds its way through older floorboards, maybe damaged by being taken up a few times, or the gap left under skirting boards. That is where most of your heat losses are coming from – from air close to 0°C in the winter blowing through those gaps. Your solution should stop this – the advantage of the board sitting on a continuous batten. Personally I would have thought something like 1″ by 1″ battens would be more than enough – call me mean but I like to reduce timber costs – if you have more than an 1″ gap between the joists and the insulation then something is going badly wrong.
On reflection, whilst all three solutions will deliver benefits, I would probably choose your solution over the others as a robust and controllable option.
Hope this helps.
Kind regards
Jon
Great article!
I’m wondering: we are doing this on the ground floor of our Victorian property (suspended wooden floors also) but have a LOT of copper water piping that runs close to the floorboards at times as well as lower (closer to the boy town of joists. How would you deal with cutting and fitting the insulation around such piping? Do we need to insulate the pipes separately? Thanks!
Hi John,
Thanks for putting together such a comprehensive article! We’ve literally just started redecorating the open plan living/dining room in our 1930’s semi, including sanding & waxing the floors throughout. We are going down the route of insulating from above using PIR board.
Please could you elaborate on how you fitted & finished the access hatch?
Many thanks,
Simon
We recently completed the same job for a client using 100mm Recticel and Gapotape. If you havn’t heard of it have a look at the website http://www.gapotape.com. It is the first proven product to eliminate the performance gap and gives you the full U-Value that is stated by the insulation guys.
it really is good stuff as you can cut your boards a few mm shorter that the gap, add the tape and do a friction fit, over time the memory foam moves as the building does so it always keeps an airtight seal and stops the gaps from appearing. It is also quicker to install as it takes out any imperfections in the cut or the rafter elements.
This is brilliant, am half way through the exact same project, sat in the room ready to give up and come across this.. brilliant guide and also well thought out.. by luck and research I am doing the same, using treated battens with 100mm celotex sitting on top. Got my aluminium tape and am looking forward to completing the whole downstairs over time.
I was told to leave a gap round the room edges and use a friction fit 100mm Rockwool in the 500mm gap as I have rewired the room around the edges so I never have to disturb the rest again, and can just access via panel the necessary bits to add in future. What did u do?
We would like to do this in the dining room of our Victorian terrace for both heat and to keep rodents out. If I wanted someone to do this for me, who would do that? I don’t know who or what to search for really.
Hi Paul
It is not easy to find people to do this sort of work as it is quite specialist. With the demise over the last two years of the various government funded grants for insulating properties, many of the specialist companies that did this sort of work have faded away to do different things. Many builders involved with house renovation will have had experience of insulating suspended floors so it may be worth trying a few small local builders near you to see who carried out the floor refurbishment work for them. Hope this helps.
Kind regards
Jon
Hi there,
Great article, thank you.
I am about to set off on the same job this week. I have one question which you may be able to help me with.
Should central heating water pipes be installed below or above the insulation? There seems to be space for either.
Many thanks,,
Ryan
Hi Jon,
What masonry tape did you use/where can I obtain some? Been searching for one myself to carry out the same project. Thanks.
Hi
It’s best to use an airtight tape that is suitable for masonry (to stick to the walls) and timber (to stick to the joists). I found one randomly in a local timber merchant that did the job but can’t recall the brand. I was just pleased that it stuck to the pretty damaged plaster behind the skirting boards. Having looked on a few online forums people seem to rate DAFA split back tape as well as Tyvek tapes and Siga tapes. It’s pretty specialist stuff so you might either need to chat to someone in the local builders merchant or search online. I found a blog at http://www.evolvedenergy.ie/blog/ which may give you a little more detail. Hope this helps. Kind regards Jon
Hi – we’re about the embark on underfloor insulation (from above) in our 1930s house. Couple of qns:
Did you do a cost comparison between slab and roll insulation? I believe we’d be looking at 70mm slab vs 150mm roll.
Second, we live in Cornwall. Radon is an issue. Can you recommend a barrier? Are we simply looking for an airtight solution or does it have to have additional properties?
The second question means I am leaning toward using the roll as I suspect it’s cheaper and the barrier could support the roll (Lay it across-down-across-up the joists so they are ventilllated from below.)
Hi Peter
I must confess I didn’t do a specific cost comparison between slab and roll as it was quite hard to calculate – it’s a balance between labour and material costs. The biggest labour element is removing and replacing the floorboards themselves. The slabs are covered in Aluminium foil so they have a built in Air and Vapour Control Layer (VCL) without the need to purchase one separately. Also they can pretty much support themselves with the help of battens. The downside is that you have to cut them to joist width which can take time in a 1930s house with irregular joist spacing. Our joists were 100mm so 100mm thick insulation fitted perfectly and we were looking for the maximum insulation and to stop draughts. With roll insulation you do need to support with timber or some form of net underneath and then apply a VCL to the top (warm side). Where there are dwarf walls to support joists you will need to ensure you don’t block all the airflow with insulation.
I am not an expert on Radon. I would think that an Air and Vapour Control Layer would offer some protection; I don’t know how a Radon Membrane such as the Visqueen Radon Membrane differs from a conventional VCL. Depending on the level of Radon gas you should also be making sure that there is adequate ventilation of the sub-floor void. In more extreme cases this can require a sump with a pump to make sure there is no build up of Radon.
I didn’t quite follow your comment on using the VCL as support for the roll; most of the advice I have seen is that you would use netting for this and then use a VCL over the joists. I have seen breathable membrane used for support which also acts to reduce draughts but I do not think it would be any use to stop Radon from entering the house. Historic England (formerly English Heritage) have some roll solutions in their guide to Energy Efficiency and Historic Buildings: Insulation of suspended timber floors.
Hope this helps.
Kind regards
Jon