For those considering whether to insulate a suspended timber floor, this article describes our experiences installing PIR thermal insulation board from underneath the floor using the crawl space. For details on insulating from above the floor see Insulating A Suspended Timber Floor From Above Floor.
We chose to insulate from underneath the floor as pulling floorboards up was not an option; we either had vinyl flooring (posh lino) laid over floorboards or original 1930s oak flooring.
Insulating from below involves crawling in the cavity under the suspended floor. You obviously need enough crawl room to work; my experience is that you need a minimum of 5 and ideally 6 bricks below the level of the joists (38-45cm or 15″-18″ of space).
It is possible to work in smaller gaps but it becomes very difficult and I would only consider it for small areas of floor. Whilst working under a floor can be quite claustrophobic it can also be quite relaxing as well; I guess that’s why some people enjoy potholing as a hobby!
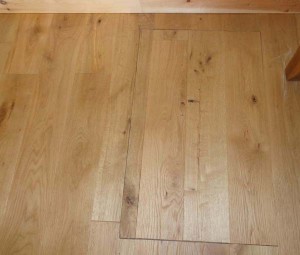
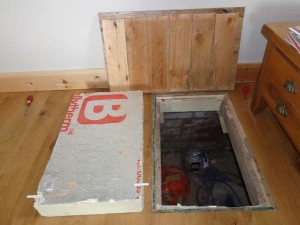
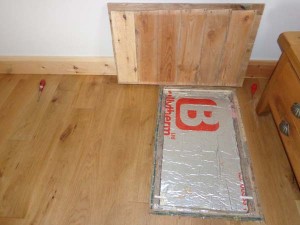
You also need easy access to the crawl space.We had already installed an access hatch in our lounge which could easily be lifted using a screwdriver to lever it up. Below the hatch was a removable section of PIR thermal insulation board.
The hatch size was one joist width by about 6 floorboards wide (about 650mm). 650mm is more than generous and in fact we could have probably reduced this to about 450mm and still had easy access for people and materials.
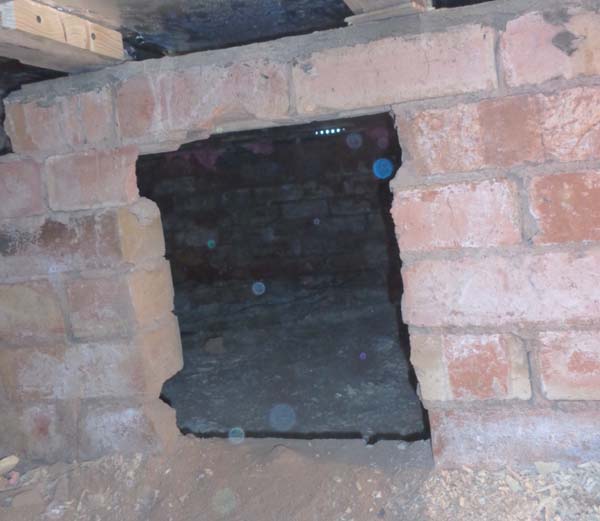
From under the lounge most other areas of the ground floor could be accessed through holes in sleeper and load bearing walls. These holes had been cut some decades before, presumably to allow the installation of central heating pipes; more recently they had been used to rewire the house and to install a newer central heating system.
Working conditions
For safety reasons this work really needs two people to be present at all times; if you did have an accident underneath the floor then it is essential that someone else knows you are there. They don’t actually have to do any work (although it would certainly help) but should be on hand to call for help if necessary and at least make a brew from time to time for the serving worker. You are likely to find gas pipes, electricity cables and central heating pipes under the floor area so do consider what risks these could create.
The work area was lit with an inspection light, fed from an extension reel plugged in “up top”. This light was topped up with a hand held battery operated LED inspection light which provided a bit more light on a specific area.
It’s dusty down in the cavity, particularly if you trim any PIR thermal insulation board down there. Overalls came in handy and a dust mask is essential. The disposable dust mask worked well but with hindsight I would have invested in a full face dust mask which covered the eyes as well. Lying upside down there was a high likelihood of getting things falling in your eyes; I wear glasses so it is less of a problem but a full face mask would have been better.
The ground under the floor can be quite bumpy – it may be a soil or a concrete base – so it is worth having some form of foam pad to lie on when working (especially if you encounter pieces of discarded wires and pipes).
Surveying The Area
It can be quite wearing to move around a lot under the floor and some work is best done above the floor so it is wise to plan an effective way of working.
I decided to do the entire measuring task first as it also gave me the opportunity to assess what I needed and how easy specific areas of the floor would be to access and insulate. At the same time I could assess where different thicknesses of insulation were required, where air bricks needed clearing and how I was going to handle cables and pipes from existing services.
Measuring was done with me underground with a tape measure and with an assistant armed with pen and paper above. Each area for insulation was given a letter and a joist number so I knew where I was measuring. So the first gap between the joists in the kitchen was location K1, the next K2 etc. The key dimension to measure is the gap between the joists which is hopefully consistent for each two joists. In my case there were no perfectly parallel joists so I measured 3 or 4 points and recorded the maximum and minimum over a 1.2m length (the length of the rigid insulation I was using). So K1 was 36-37cm width and 260cm length. The length of insulation was generally the same for most joists in an area.
All the measurements were yelled through the floorboards to the assistant above along with any other observations on work that needed doing.
Installing The Insulation
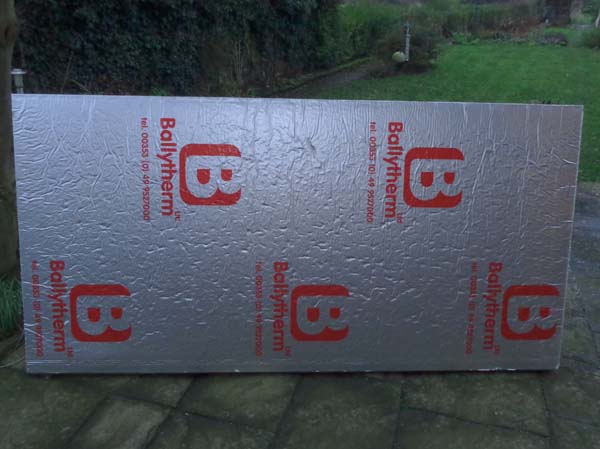
Above ground with the measurements the work to cut insulation boards could start. I was using 2.4m x 1.2m PIR thermal insulation boards which are faced with aluminium foil. For ease of working I cut 1.2m lengths of various widths out of the board. The cut insulation needs to be manageable in a tight space and a larger size than this would be difficult to get through the twists and turns in the sub floor area.
I chose to cut boards for a whole area (say the kitchen) and then install them as I was working on my own. I cut the maximum width, which in the case of our K1 example was 37cm and labelled the first 1.2m of this K1a, the next K1b and so on until I had sufficient length to fill the whole length between the joists. When I had about a dozen cut pieces it was time to head underground.
The tools and fixings I took underground were:
- dust mask
- floorboard saw to make final adjustments to the insulation width
- cordless screwdriver
- tape measure
- 3.5 x 30mm screws
- 100mm length of 10 x 45 batten
- Aluminium tape
- fire rated foam filler 700ml – for filling any gaps in insulation
- plastic rubbish bag – to collect offcuts of insulation
- angle grinder with masonry cutting disc – used to cut access hole in one sleeper wall and to smooth off the rough edges of another sleeper wall so I could squeeze past more easily.
Moving the labelled pieces of insulation is not without its challenges, especially if you are working 5 or 6 metres from the access hatch. You have to decide whether you are going to push them in front of you as you move or pull them along after you. I used both methods; it was a balance between storing the insulation so the pieces were easily accessible when working but also not cramping the work area.
Be careful when using foam filler. It is a nightmare when wet if you get it on your hands or body (easy to do when you are filling above and crawling on your back). The cans are under pressure and can easily be punctured; I put a can down a little carelessly and it hit a sharp brick and punctured; it proceeded to empty itself completely which was a little disconcerting as well as a few quid wasted. If you do get any on you or anything else then let it set; it is far easier to remove when it is fully expanded and set.
When arriving at the location of the next piece to install it was a case of identifying the correctly labelled piece and then rolling on my back to try and fit the board between the joists. As most of the joists were not parallel to each other it was a case of visually assessing how much material to remove to allow it to fit between the joists. This usually involved removing material from one end of the insulation.
There were two methods I used for this:
- where there was significant material (more than 10mm) to remove then I would cut this with a saw. This involved rolling onto my front and then finding a suitable place to allow the board to be cut without elbows hitting joists or walls.
- where there was less than 10mm then I tended to use the saw to stroke down the full side of the material, wearing it away to the right size. The benefit of this method is that you could do it lying on your back with repeated re-tries to fit the insulation until it was a good fit. The downside is that the under floor area became very dusty which is why a mask which protects mouth, nose and eyes is essential.
Once the board was the right size it could be gently tapped into position by hitting each side of the insulation until the bottom of the insulation was flush with the joist.
When a few boards had been installed then Aluminium tape was used to seal any joints between boards. I also used tape between the joist and the board so there was no air flow possible. The 100mm battens were then screwed into the 50mm wide joists at right angle to them to ensure no movement of the insulation was possible. For each 1.2m length of insulation I would use 3 battens per side; supporting the middle and both ends.
Small gaps were filled with fire rated foam. These occurred either due to inaccuracy in my cutting or where two joists were butted up against each other and there was no room for insulation.
Improving the under floor ventilation
The under floor area relies on good ventilation from air bricks and a good movement of air. Where we encountered sleeper walls then we switched to 50mm thick insulation to allow air to still flow over the wall between the joists. This gap was in addition to honeycomb gaps left in the walls and the cut access holes. Had we used 100mm insulation then all the air flow would have been blocked. The 50mm insulation was butted up to the floorboards with battens screwed to the inside of the joists.
Insulating central heating pipes
After insulating the floor there should be no air flow between the warm room and the cold under floor area. So central heating pipes are at greater risk of freezing and should be insulated with pipe insulation (with all joints taped).
The pipes should have been already insulated when they were originally installed but this is not always the case and it will also help your gas bills if you are not heating the sub floor with your hot heating pipes.
Result
The end result was we had a suspended timber floor with no draughts and which did not feel cold. We saw a big fall in our overall gas bill (see Ten Steps To Saving £1,000 On Our Gas Bill) as well as having a nice warm and comfortable house on a winter’s day.
I would certainly use this method again if we ever moved into an old house with suspended timber floors and overall thought it was a better and less disruptive approach than taking the floorboards up to insulate. Having two people, one above ground and one below, would have also made the task a lot easier.
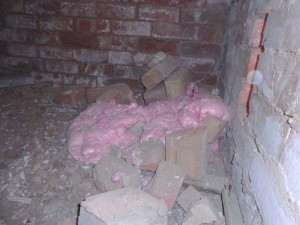
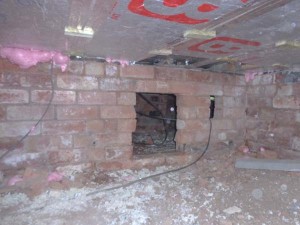
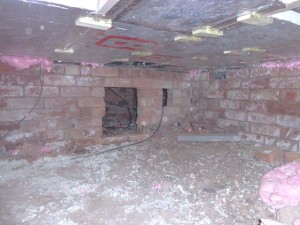
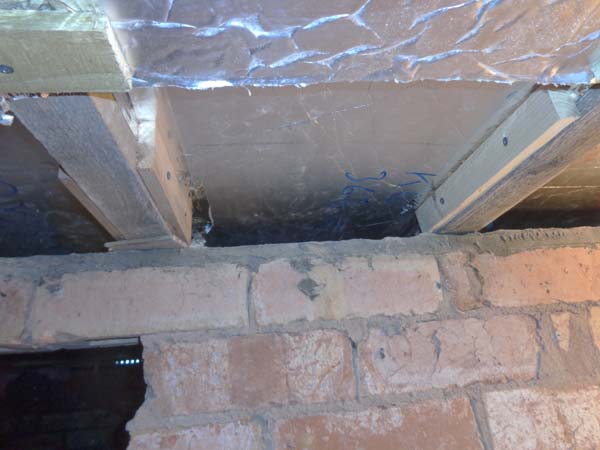
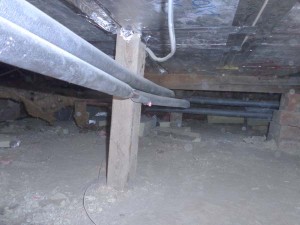
“When a few boards had been installed then Aluminium tape was used to seal any joints between boards. I also used tape between the joist and the board so there was no air flow possible”
– how did you maintain exposure for the joists to breathe?
Just wanted to add my praise for this blog, fantastic in its details. Will be having a look under our floors soon and I hope to emulate your fine work!
I just wanted to say thanks for such a complete and easy to follow set of instructions. I have a bungalow with up to a metre of space under much of the flooring with no insulation and have been daunted at what needs to be done but, having spent a fortune on solar panels and other energy saving stuff, it’s now time to tackle this and am now looking forward to it.
Hi
I was wondering if you could assist me I currently live in a detached bungalow approx. 200 m3 which was built in 2011 and Although the floor is fully insulated with mineral wool and a vapour permeable membrane you can still feel cold air through out the house from every floor. This has resulted in the house never retaining heat for long and costing a fortune on heating oil to keep warm. I have always suspected that it is due to excessive pressure under the floor forcing its way up through the floors. All the windows are double glazed upvc and the ceiling is fully insulated up to almost half a meter and all internal and external wall are also insulated. I was wondering if you had any advice on a way to tackle this. To note the house is L shaped and located in the western isles of Scotland.
Thanks
Hi Keith
Sorry to hear of your cold air problem. It can be hard to diagnose these sorts of issues. A couple of ideas, just based on my own experiences.
1. Don’t underestimate the ventilation losses from suspended timber floors round skirting boards – even if the floor has a membrane does it cover the skirting area? A good way to tell is if you have fitted carpets and the carpet at the edge of the room has a slightly dusty stain to it where dusty air from the floor cavity is continually blowing over the edge of the carpet.
2. Many new properties use drylining plasterboard with “dot and dab” rather than wet plaster as it is cheaper and faster to install. The downside of this is that there is the potential for cold air to circulate behind the plasterboard, chilling the room and bypassing the insulation. The cold air can get through either when services are installed to the outside (waste water pipes, heating condensate pipes, telephone, broadband and cable tv entry points).
Not saying either is the cause of your problem but it may help to check it out.
Kind regards
Jon
Hi – just looking at doing this – I noted in another blog that it said you needed to leave 25mm of joist showing to prevent dry rot etc….see below….
The insulation can, and should, be pushed tight to the underside of the floorboards. At least 25mm of the joist must be left exposed to ensure air circulation; this is to prevent the joist becoming damp and encouraging dry rot. For the same reason, any airbricks must be left clear to ensure a good air flow.
——————————————————-
Just after whats best, any view on the above, thanks Ian
Hi Ian
On under floor ventilation i can only reinforce what you have said – unless you have good flow of air from air-bricks then there is the potential for damp. You really need cross flow of air. So if you have a property built without air bricks (before about 1920) then you will need to consider ways of achieving a damp free and well ventilated environment.
On leaving at least 25mm of the joist exposed I haven’t any direct experience. Where I have encountered dry rot it is in un-insulated floors where the joists have been sitting on damp/wet brick work with little ventilation; it’s a problem waiting to happen if you have this situation whether you insulate or not. If you were concerned about damp then for peace of mind it wouldn’t hurt to reduce the insulation thickness slightly near outside walls. The reality is that much of the heat loss from your rooms is from ventilation heat loss rather than thermal heat loss so whether you used 100mm or 75mm thick insulation throughout you would get most of the benefits. It also depends on the thickness of your joists to start with.
Of course if you are using mineral wool rather than rigid board insulation then this is vapour permeable so I would have no hesitation in using the whole of the joist. This is what Historic England would advise for buildings that need to breathe and where having a vapour control payer could cause problems. See Historic England’s guide: Energy Efficiency and Historic Buildings: Insulation of suspended timber floors. They have updated this publication a couple of times now so this tends to reflect their latest experience with older more sensitive to damp buildings.
Kind regards
Jon
Hey John, great article. Really helpful. I am looking to do this and wondered if insulating the floor made its acoustic performance different. For example if you jumped on it would the noise be dampened rather than the boom from the void?
Hi Andrew
Sorry for the delayed reply. It wasn’t something we particularly noticed before as we had carpet originally. When the finished wood floor went down it did feel a little more robust and less bounce.
Kind regards
Jon
I posted on a different feed before where we had used 100mm Recticel and Gapotape.
Forget all the mess of spray foam and inaccuracies of cutting the boards the gapotape deals with all of the imperfections in the joists and the board cut, give it a go its fantastic.. If I could upload pictures on here I would show a job we completed in March.
Have a look at the website gapotape.com. Simply cut your boards a few mm shorter that the gap, add the tape and do a friction fit, over time the memory foam moves as the building does so it always keeps an airtight seal and stops the gaps from appearing. It is also quicker to install as it takes out any imperfections in the cut or the rafter elements.
Hi, great article just wondering whether you need to leave a gap in between the insulation and the floorboard, if so what size gap?
Could you do this in preparation for underfloor heating .I’ve got a suspended floor which i want to tile and then put UFH under the mat type .But I don’t want to come up to high with the tiles.
Hi,
Presumably having the battens at right angles to the joists only works if the insulation board is the same width as the joists? My joists are slightly longer than the width of the 100mm board.
Thanks
Will
Hi,
I am not planning on leaving the boards exposed but will carpet instead. Do I still need to go to the length of insulating from underneath or is there a quicker and easier option for me?
Thanks
Will
Hi, just reading your article on insulating under a suspended floor. Is there any reason why you cant just put the insulating boards across the floor joists instead of between them? This would save a lot of time and effort but I’m not sure if there is a reason you shouldn’t do this.
Thanks
Will
Excellent article. We have a 50s house with no insulation under the suspended timber floor and plenty of vents in the exterior wall – brr!
Hi Jon, thanks for this, very handy. I’m about to do this on my floor. Is there a need to to lay a vapour membrane too to enhance the insulation process and should this be place above the insulation (between Floorboards and beams) or below (attached to the underside of the beams). Thanks
Hi Dan
It depends to an extent what sort of insulation you are using. If using rigid Celotex/Kingspan type PIR thermal insulation board then these already have a vapour control layer in the form of an aluminium foil both top and bottom. So adding any form of membrane is unnecessary from a vapour point of view and if you have filled all the gaps in the rigid insulation (especially the skirtings) then there really shouldn’t be any need for one to stop draughts.
If you are using mineral wool or sheep’s wool then you either want a vapour and air control layer above the insulation (to prevent moisture from above, allow it to be ventilated from below and to block any draughts) or a vapour permeable membrane below (to allow it to be ventilated and to stop and draughts). You would choose which of these was best based on your preferred method of insulating (from above or below).
Hope this helps and all the best with your project.
Jon
Hi Jon, great article – probably the best one I have read on-line to date. It looks like you are 1 year down the line after fitting this insulation. I would like the know if you have inspected and found any damp, moisture or condensation around the joists. What about any moisture laden air from the room above convecting downwards onto the top of the foil backed PIR board. Wouldn’t this be hitting the potentially cold surface on the top of the PIR insulation board and condensing to form moisture around the joists? This is one of the considerations that is making me think twice about doing this in my home (1901 house, suspended timber floor, air bricks and about a 2ft void underneath). Also, what about any liquids spilled from above – do you think this could cause rotting on the timbers? As I can see from your photos the insulation plus the aluminium tape effectively seals up from underneath. Thanks again.
Hi Gavin
Thanks for the feedback. We have now sold the house (and moved to an eco-house) so I can’t give you an up-to-date status. However when I went under the floor just before we sold it everything was fine.
It is sensible to address any potential damp, ventilation or maintenance issues before you insulate; I should add that it is important to do this anyway as these sorts of issues will grow to be a long term problem whether you insulate or not. You will get to know the floor cavity pretty well so it’s an ideal opportunity to make any repairs. In my case I did re-do a small amount of re-pointing of the exterior mortar at ground level as part of one of the walls was initially slightly damp and it looked like rainwater ingress. In the same area I also moved a joist by about 4″” as it was obstructing an air vent slightly and this allowed better cross ventilation.
In theory the foil insulation at the top of the foil backed PIR boards will be at room temperature as you have 100mm of insulation underneath that to stop heat loss so moisture shouldn’t form there. If you occidentally spill liquids then they will eventually evaporate into the room. It’s not a lot different to spilling water on a laminate floor. If you are planning on this being a regular occurrence (eg by a kitchen sink) then you may wish to put down a non permeable floor covering like lino or tiles.
In summary if you think you have an existing damp problem then get this sorted anyway with the right level of sub floor ventilation. Bear in mind that solid walls can also cause damp problems, especially if you have rain driving onto it from the prevailing wind.
All the best with your project.
Jon
“You can also subscribe without commenting.”
No you can’t!
Hello,
I thought this was a very helpful and informative article in preparation for a similar task I’m about to commence. I have several other questions: how did you accommodate wiring that crosses through the joists at right angles? Cut slots in the insulation board?
And what about small gaps between the joist and outside wall? In my case the gap is 50-75mm so quite large for expanding foam. I assume small strips of insulation board butted between external wall and joist would be ok.
Hi Andrew, thanks for the feedback.
Electrical cables
Electrical cables ideally need to be run outside of the insulation board. Advice from manufacturers normally says that cables can run through the insulation only if they are oversized to cope with any increase in operating temperature. They also don’t recommend cutting a channel in the insulation as it reduces its performance although in your situation if you can’t easily re-route the cable this is probably the best option. You need to be careful that there is sufficient air gap round the cable to allow heat to dissipate rather than it being tightly surrounded by insulation – think of it as running electrical conduit. Someone with knowledge of wiring regulations could advise you on what impact the insulation will have on the current carrying capacity of the specific cable. Generally speaking if the wiring is a ring main which is working well under it’s design load then it should not be a problem but if it was say a 6mm cable for a 9.5kW electric shower then adding the insulation covering would mean the cable current carrying capacity would fall well below the load from the electric shower.
Would be interested to hear from anyone who has found an alternative solution to this cables through joists problem.
Gaps between joist and outside wall
For gaps of 50-70mmn between the joist and outside wall I would use small strips of board as you suggest. Just make sure they are secure in some way as the board does contract at lower temperatures so may fall out unless secured firmly.
Hope this helps and good luck with your project.