Father Christmas has been and magically I am now the proud owner of a FLIR C2 thermal imaging camera. It’s not one of those thermal imaging cameras that cost thousands, it was just over £600, but it does have enough capability to track down some elusive heat loss problems in houses. It comes with some useful software for a desktop computer that makes generating and sharing thermal imaging reports quite painless.
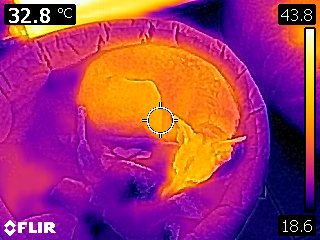
Of course I have mostly been playing with it. Yes I have taken a thermal image of our Lurcher in her basket and yes she does look warm next to the radiator. But apart from the fun, I have also been using it as useful diagnostic tool to understand and answer some of the questions that I ask myself about houses and how we can make them warmer and more energy efficient.
I can share one answer now; related to our Mechanical Ventilation Heat Recovery (MVHR) system. There are a couple of bigger problem that I want to tackle with the thermal camera but these can wait for another day.
MVHR ducting insulation
Having an MVHR system installed has been a learning experience for us (and it appears the contractor). You can read more about what an MVHR system is at Mechanical Ventilation Heat Recovery Systems (MVHR) Explained. In our case it does provide a brilliant level of fresh air to the whole house but it had felt a little cool in places during winter months. In the summer the problem was tracked down to poor insulation of the ducting that ran in the unheated loft space. The ducting was covered with mineral wool insulation but seemed to have been moved by other contractors at some stage. When the insulation was re-instated we believed it made a difference. What I wasn’t able to do was tell how much of a difference during the summer and autumn.

Now we have hit a sort of winter, there has been an opportunity to find out. Part of the ducting, to my office, is still uninsulated. I wanted to know whether it was worth the bother of getting the contractor back to insulate it (latest NHBC standards say you should insulate with the equivalent of 150mm of mineral wool) and also whether the existing insulation for the rest of the ducting was adequate.
Waiting for the right weather was important as the heat loss will be higher when the outside air temperature is lower. I chose a rare day so far this winter, when the outside air temperature was 1.5°C.
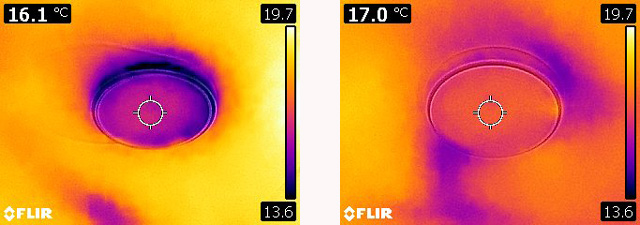
The two images show that the vent supplied via the uninsulated ducting is about a degree cooler than the vent with the partially insulated ducting. When I do spot measurements on the lowest temperature on each photo (the blackish area on the left hand photo) the vent with uninsulated ducting is 1.6°C cooler (13.6°C compared with the insulated at 15.2°C). So insulating does make a difference although the air temperature through both vents should be closer to 21°C which makes me feel the current insulation is not sufficient.
I was a little surprised about the lowish temperature of the vent supplied by the partially insulated ducting as previous investigations, when the outside air temperature was around 7°C gave a different impression.
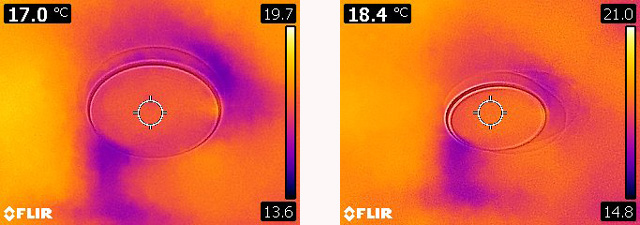
What this shows is that when the outside air temperature was about 5.5°C lower the vent temperature is around 1.4°C cooler (17.0°C compared with 18.4°C). Comparing spot measurements readings of the lowest temperature in each image (you can do this with the FLIR desktop software after the photo has been imported) then the vent temperature was about 1.7°C cooler (15.2°C compared with 16.7°C). It was only when I looked at the 15.2°C spot measurement at the colder outside temperature that I start to question how good the partial insulation really was.
It’s also worth a comment on the temperature scales for the two photos. As they were taken days apart it is difficult to get the thermal image camera to produce exactly the same scale so don’t be mislead by trying to compare exactly the same colours on the images. The camera auto-scales the image according to what it sees, which is usually very helpful. You can manually lock the scale to take a series of photos for comparison at the same time but when the camera is switched off you lose that. It is probably time for me to read the user manual in more detail to see whether I can keep the same scale for photos on different days.
It looks like my next step on this issue is phone calls to the MVHR ducting supplier (Airflow) and the contractor to try and establish what level of temperature performance they deem acceptable for the NHBC standard of insulation. Whilst I wait for their responses I have another experiment I plan to try out on the HMVR air distribution boxes which are also sited in an uninsulated loft. More about this next time.
One small caveat to this work: Room conditions can change between different days and different rooms, due to different levels of heating and solar gains, so when making comparisons it is helpful to consider the overall temperature of each room as well.
Leave a Reply