Part 3 of the four part Guide To Roof Construction covers pitched roof detail: roof ridges and ridge tiles, roof hips and hip tiles, roof valleys, roof verges and lead flashings. To get the most out of it is helpful to also read Parts 1 and 2.
Part 1 – A Guide To Roof Construction covers an overview of flat and pitched roofs.
Part 2 – Pitched Roof Construction covers pitched roof materials, basic pitched roof designs, cold and warm pitched roofs and pitched roof construction.
Part 4 – Flat Roof Construction: covers flat roof materials and flat roof construction of warm and cold roofs.
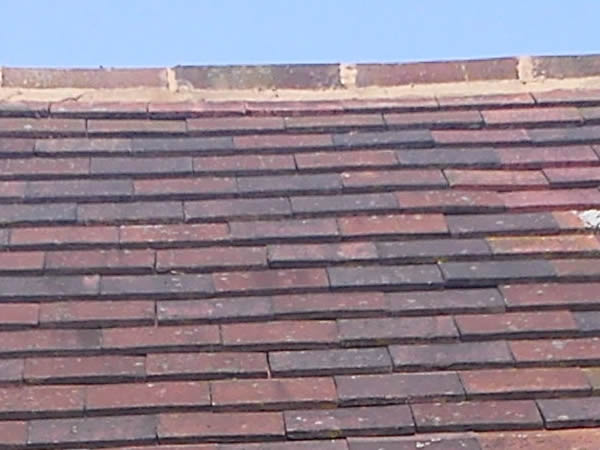
Roof Ridges
Where the two sides of a roof meet is called the ridge. To ensure that this is watertight a ridge tile is used to cover the gap. This can be bedded with mortar or a dry fixed ridge system can be used. On some types of ridge tile the mortar bedding will not be visible on the outside of the tile – the mortar bedding will be on the inside of the ridge tile. When there is no mortar visible on the outside of a ridge tile then this is not necessarily a cause for concern in itself – despite what some rogue roofers may tell you.

The joints between each of the ridge tiles are also filled with mortar.
A variety of ridge tiles are available. These include:
- Half Round Ridge Tiles
- Third Round Ridge Tiles
- Angled Ridge Tiles
- Collared Ridge Tiles – these are made to interlock with each other with a slight overlap
- Ornamental Ridge Tiles
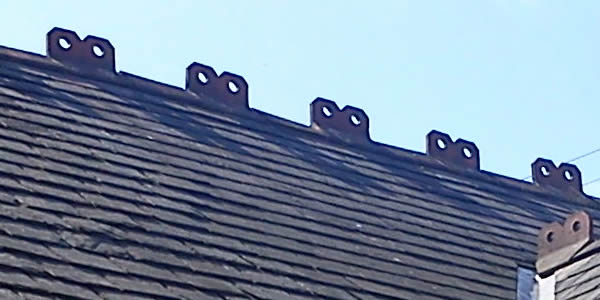
Roof Hips
A hip roof can either use ridge tile which are mortared in place or uses special tiles called hip tiles.
When using ridge tiles a hip iron is often used to prevent the tile from falling if the mortar fails. The hip iron is fixed onto the timber and then is used to help retain the mortared ridge tile at the bottom of the ridge. The hip iron should protrude above the tile.
Arris Hip Tile (left) and Bonnet Hip Tile (right)
There are two types of hip tiles generally used, Arris hip tiles as shown above and Bonnet hip tiles that have a raised area (that looks like a rounded car bonnet or a ladies bonnet).
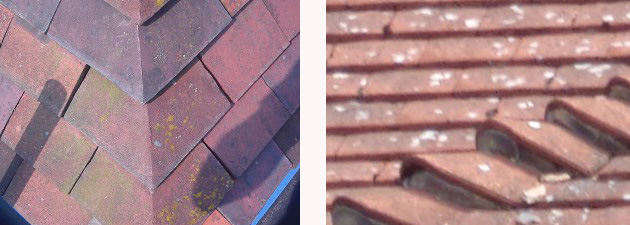
Roof Valleys
As well as hips and gables roofs often feature valleys. These are the joins between two roof areas.
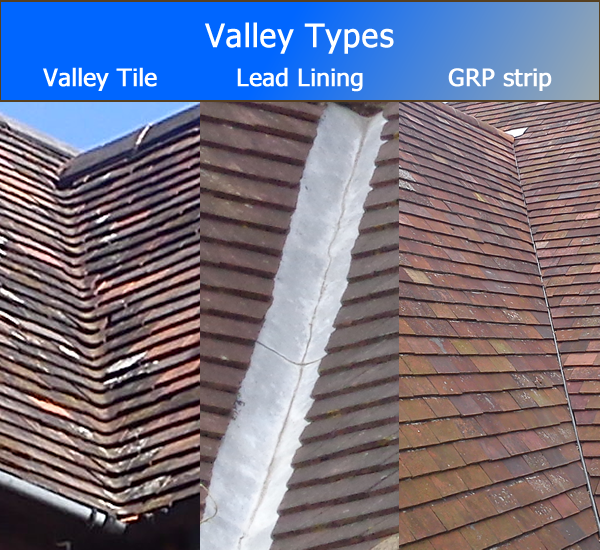
Valleys can be constructed in a number of ways, using:
- Valley tiles which allow the roof to be continued round corners ( they are special tiles which are the opposite of a hip tile really). They can only be used when the pitches of the two roofs are identical.
- An open valley, often 100mm or 150mm wide with a metal (normally lead) or sometimes a GRP lining. The valley is a drainage channel below the level of the roof which is constructed of wood with the lead to provide the waterproofing
- A closed valley with a pre-formed GRP strip. As in the lead valley example any water drains into the GRP strip and then down into a gutter.
All three types of construction can be attractive. In the photo above two of these roofs need repairing. The GRP closed valley roof has just been refurbished. The attraction of the valley tile is that each level of tile can sweep round the roof (the layers of tile on the left of the roof are continued on the right). With the lead lined or GRP valleys then the tile layers on both sides are not always aligned. It is not always possible to align both sides of a valley if the roof pitch for the two roofs being joined are different anyway. The lead valley shows one of the disadvantages of this type of valley; the tiles are not always supported and can slip into the valley. Nowadays a valley tile or the GRP strip are preferred; not least as lead is expensive and does not last any longer than GRP. Lead valleys normally use code 4 lead and strips should be overlapped with no strip longer than 2m with overlap (1.5m will be visible). This is because lead expands and contracts with changes in temperature and a longer strip will crack.
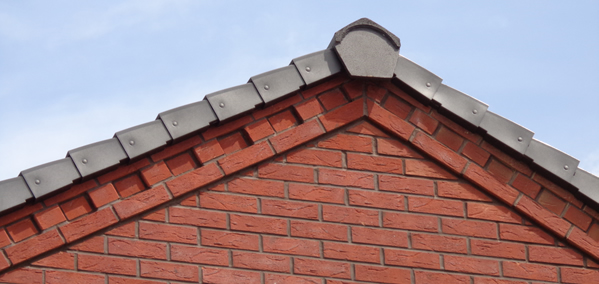
Roof Verges
The edge of a pitched roof as it meets the gable end is called a verge. Tiles here are normally fixed in some way to prevent wind and rain from getting underneath the tiles. Often the end tile of each row is mortared into place as shown below. Dry fix options for verges are also available from a number of manufacturers.
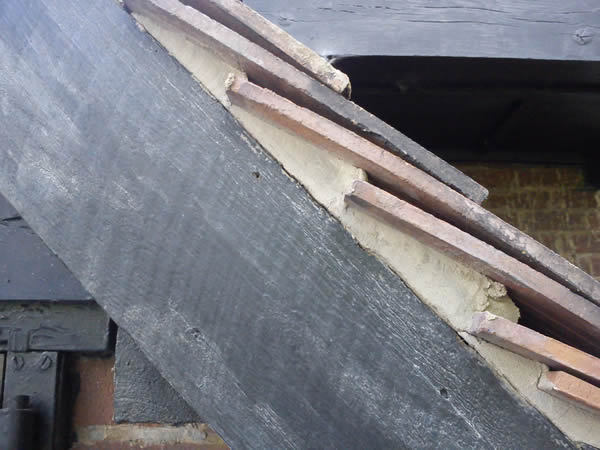
Lead Flashing
Lead is still used as a roofing material as part of the seal between any brickwork and the roof.
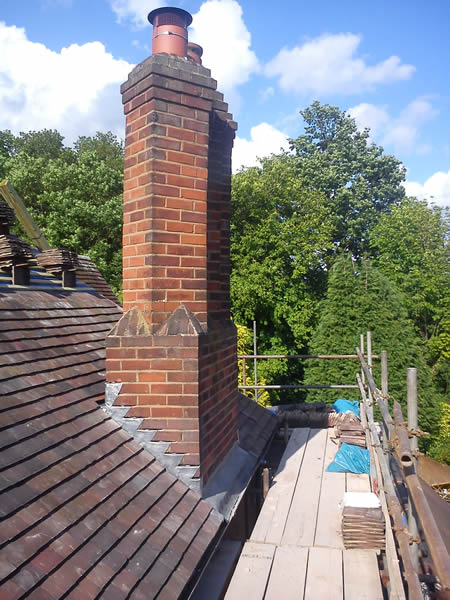

The lead flashing goes underneath the tiles and then is recessed into the mortar joins of the brickwork. It is then fixed into place using mortar (not shown in picture). A flashing for a chimney on a hip roof consists of four elements:
- Front apron – the join between the bottom of the chimney and the guttering, made of code 4 lead
- Soakers – used on the side of the chimney. These are small rectangles of lead that are hidden in the image above. They sit under the lead step flashing and the tiles closest to the chimney. Code 3 lead is used as thicker lead would push the tiles up too high.
- Step flashing in code 4 lead covers the soakers and the brick side of the chimney
- Back gutter in code 4 lead . Water falling behind the chimney need to be drained to the sides. Getting the back gutter right is a key part of waterproofing round a chimney, otherwise the water can just sit there.
On a chimney positioned on a ridge then there is no back gutter, just two front aprons.
What Next
To read about flat roof construction go to Part 4 – Flat Roof Construction: this covers flat roof materials and flat roof construction of warm and cold roofs. Otherwise we hope this guide to roof construction has introduced you to some of the basics about roofs. This should equip you with some knowledge when you discuss roof repairs and replacements with a roofing contractor. To take things further you can explore more about different types of roof as well as typical projects for repairing and replacing all or part of your roof. You can also look at common roofing problems and their solutions at Pitched Roof Problems And Roof Repairs.
See Also:
Part 1 – A Guide To Roof Construction:
Part 2 – Pitched Roof Construction
How to join the ridge cap of an unequal roof pitch, where they meet at the top. I’m having great difficult with the hip ridge ends up higher than the ridge itself ?
Wyn Williams
Hi Jon, We are looking to buy a bungalow and have so far just seen it the once, but want to go ahead with it. I did not notice at the time, but the rear view photo shows 2 pitched roof sections with what looks like a flat valley between them. The valley drains to a common roof gutter across the back of the property, before reaching a down pipe a few metres away. Catchment area feeding valley may be around 12 square metres (pure guess) Bungalow is 12 years old, should I be concerned, as there is no obvious valley gutter other than perhaps valley times)?
hi anyone know how best to meet two pitched roofs together?
I have just had a new pantile roof covering laid. The mortar to the newly laid valley does not appear to be bonded to the valley tiles. It has cracked along the joint of tile and mortar. I think it may be where the valley tiles are cut in-situ, the underside of the tile becomes dusty and the mortar does not stick to the tile. Is this going to be an issue for water getting drawn in?
Hi Paul
Generally the mortar is to support the edge of the tile so it does not tip into the valley, rather than to make it water tight. The roofer should have assumed that some water will find its way behind the mortar bed. Proprietary valley troughs will allow for removal of this water as should any leadwork if lead is used so I would not consider water getting drawn in as a big issue.
On a related note, since September 2012 Health and Safety Guidance is that valley tiles should not be dry cut in-situ. They should be cut off the roof surface on the scaffolding using water suppression and respiratory protective equipment (RPE). Dusty tiles seems to indicate that these tiles were not wet cut. Roofers think you don’t get such a clean finish using this method but it is to avoid damage to lungs and airways from Silica dust.
Kind regards
Jon
I have had some emergency tiling repairs done on our slate roof where the tiles had been damaged after high winds. One of tiles above our downstairs bathroom had a big hole in it which must have been damaged by being hit by a hard object during high winds. This has been repaired however, we are still experiencing some dampness along the edge of one wall in one of our bedrooms which appears to be seeping in from the roof. We have a pitched roof without any kind of attic. Outside there is no apparent damage to any more tiles which the roofers have confirmed. However, looking at the roof it appears that some of the mortar bedding has broken away from under the ridge tiles. Is it possible that this is causing the dampness? Many thanks.
Hi Chris
Sorry to hear about the leak. Without seeing the site it’s hard to be specific but I can make some general observations.
If it were me I would get quotes from two or three professional roofers to re-bed the ridge tiles which could be part of the source of damp as wind driven rain is pushed through the gaps in the mortar and trickling down to the eaves. However at the same time I would also be asking them to inspect the eaves area by the bedroom concerned just to see if there are any other possible causes (see below).
The first line of defence from rain and snow for the house is the tiles. In most houses the second line of defence is generally a roofing felt – nowadays a vapour permeable membrane but in older properties a vapour impermeable bitumen felt. If water gets past the tiles, either through damage to the tiles or through wind driven rain or snow, then the roofing felt is supposed to provide secondary protection and catch this water and let gravity steer it down to the eaves where it is deposited in the gutters. So to get damp requires both lines of defence to be breached somewhere. Slate roofs in good condition tend to be pretty good as a first line of defence and originally didn’t use a felt at all; as homes were often draughty any water that did make it through would be dispersed by ventilation.
What else might have happened? High winds or the passing of time may have caused part of the roofing felt to fail so it is not providing the secondary protection it should. Failure round the eaves felt is not uncommon and normally shows as damp in the ceiling in a strip by outside walls, which is why it would be worth getting someone to inspect the roof in the area affected by removing one or more tiles.
Whether this is an ongoing issue depends a bit on luck. It could be that felt isn’t even installed in your roof so the damp is simply the residual influx of water from the tile damage which will dry out with time provided the repair has restored the roof to it’s pre-damage state. Rebedding the ridge tiles will also cut out a potential source of water ingress.
Hope this helps and good luck with your project.
Kind regards
Jon
What is the purpose of the iron hook on the end of the hip. Should it be higher than the hip.
Hi Iain
Hip irons are used to support the bottom hip tile (the ones above are supported by the ones below) when using a mortar rather than a dry system. It’s particularly important whilst the mortar is setting so that the whole hip with fresh mortar doesn’t just slide off the roof. They are also partly used for decorative effect. They should protrude above the tile. Once the mortar is set then the iron is retaining the block of mortar which is used to support the rest of the hip.
Excellent site , Thanks for the information ,if you wanted to improve the site maybe you might add something about the various names of items in roofs which normal laymen like myself wouldnt necessarily know , things purlins etc,otherwise truely a great site